Advance Notice

No new orders are currently being scheduled.

29 November 2011

Beat the Spread


No, this isn't a tip for how to beat the extra pounds that we all seem to acquire between Thanksgiving and the New Year...but it is a tip for how to make sure your holiday cookies bake up at their best!

Instead of arranging the cookie dough balls in a straight line, try staggering them.  This will help keep the cookies from spreading into one another as they bake.

Mmm....tasty!


23 November 2011

Sour Cream Chip Muffins

These muffins make a perfect breakfast or a great snack and are quick to whip up using ingredients you probably already have on hand.  An added bonus to this recipe is that you won't even have to get out the mixer!  Try using different flavored chips to change things up - mint chocolate chips lend them a festive holiday feel and are one of my favorite variations.

Sour Cream Chip Muffins
Printable Recipe
Adapted from Taste of Home
Yield:  Approximately 1 dozen muffins
Time:  30 minutes

PB200217_ew


Ingredients:

  • 1 1/2 cups all-purpose flour
  • 2/3 cup sugar
  • 3/4 tsp baking powder
  • 3/4 tsp baking soda
  • 1/4 tsp salt
  • 1 egg
  • 8 oz sour cream
  • 5 Tbsp butter, melted
  • 1 1/2 tsp vanilla extract
  • 1 cup semisweet chocolate chips

Preparation:
  1. Preheat oven to 350°F.  In a large bowl, combine the flour, sugar, baking powder, baking soda, and salt.  In a separate bowl, combine the egg, sour cream, butter, and vanilla; stir well.  Add the wet ingredient mixture into the dry ingredients; stir just until moistened.  (Dough will be thick.)  Fold in the chocolate chips.
  2. Fill 12 greased or paper-lined muffin cups 3/4 full.  Bake at 350°F for 15 to 18 minutes or until a toothpick inserted near the center comes out clean.  Cool for 5 minutes before removing from the pan to a wire rack.  Allow to cool completely, then store in an airtight container.

Happy Baking!

22 November 2011

Turkey Tip: Stuff, Cook, Eat


Thanksgiving is only 2 days away!  I hope you've got your turkey thawing in the refrigerator by now...

For today's tip(s) though:
  • Don't stuff the bird!  Stuff the turkey after you cook it if you'd like, but stuffing it prior to cooking can result in an unevenly cooked bird.  To ensure you have a good opening to place the stuffing in after cooking, place a large soup can (both ends removed) in the bird's cavity; you can also add aromatics if you'd like.  Just remove the can and add the (cooked) stuffing while the bird rests.  If you want the stuffing to have those awesome crunchy bits, just make a couple of passes over it with a blowtorch.
  • The bird will need to roast for 15 to 20 minutes per pound (325°F is the recommended oven temperature).  But, how do you know when it's done?  Just place a meat thermometer in the thickest part of the thigh, taking care not to touch the bone; the temperature should read 155°F.
  • Allow the turkey to rest after cooking.  Tent it loosely with foil after removing from the oven and let the bird sit for 15 to 20 minutes.  This will allow the internal temperature to reach 165°F.  Then it's time to carve and eat!
One last little bit of fun trivia for you:  It takes 3 to 4 hours to roast a 14 to 16 pound turkey, but only about 20 minutes to eat it!

Happy Thanksgiving!

Mmm...Tasty!


17 November 2011

Birthdays, Baby Showers, & Boone

Boone Pickens Stadium that is.  Remember, last time I posted cakes I mentioned I was going to attempt OSU themed cake pops?  Well, here they are:

PB040042_cew

I was pleased they survived the road trip (turns out we have some very ROUGH roads here in Oklahoma...surprise, surprise); they were a big hit at the tailgate.  And I learned that football shaped cake pops are not nearly as easy to make as I initially thought...but the less then perfect appearance is easily forgiven when there's chocolate cake inside!

The birthday cake below was rough iced with yellow buttercream and included a hand cut monogram and fantasy flower detail.  The yellow icing wasn't quite as bright as it appears in the picture, it was actually quite a bit more pastel.

PB020012_cew

The second birthday cake from last week; however, really was as bright as it appears.  I was told the birthday gal loves baby blue and daisies, so this cake was a fairly easy one to design.  The colors are a great, cheery combination!  The cake was mostly buttercream, only the daisy petals were made from fondant.

PB080065_cew

And, lastly, this adorable baby shower cake.  The design was taken from the invitation, and is made from fondant pieces.  Each color was cut to shape, then the pieces were fit together like a puzzle; then I painted on the eyes, noses, and mouths using a little bit of black food coloring.

PB040014_cew

I'm busy planning desserts and other yummy goodness for Thanksgiving next week.  The only problem is that I have more recipes I want to make than our guests could possibly eat...cheesecakes, fruit, custard, and cream pies, cookies, brownies, and bars, homemade breads, pastas and potato dishes, layered salads and delicious dips, vegetable and fruit sides...I suppose I need to pick just a few, and save the others for a different time.  There is always Christmas...or I could just find a few willing folks to sample the recipe of the week, whatever it may be, for the next year or so.  Hmm, there's an idea...any volunteers?

15 November 2011

Turkey Tip: Thawing Time


Using a frozen bird this year?  Remember to leave plenty to time for the turkey to thaw in the fridge - allow approximately 1 day for every 4 to 5 pounds of turkey.  That means your 15 pound bird should be in the fridge Monday morning if you want it in the oven Thursday.

And, for a turkey that roasts more evenly, remove it from the refrigerator 1 to 2 hours before cooking to allow it to come to room temperature.  Just don't leave it any longer than that and always remember to take care not to allow the raw bird to come in contact with other foods!

Mmm...tasty!

08 November 2011

Turkey Tip: How Many Pounds?


Cooking the bird for Thanksgiving this year and wondering how big of one you should purchase?  Wonder no more! Plan for about 1.5 pounds of turkey per person, and don't forget to factor in a little extra for leftovers and the possibility of third, or even fourth, helpings!

Mmm...tasty!


03 November 2011

The Great Pumpkin of 2011

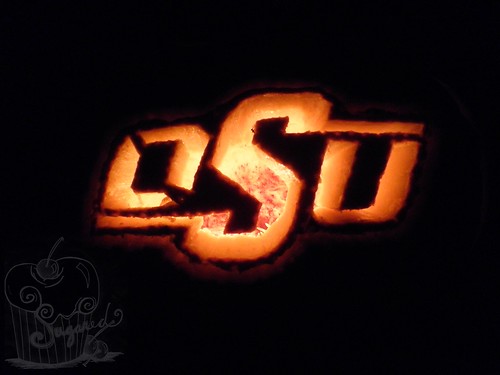
Don't worry I have cake goodies to share with you today as well.  But, first, the great pumpkin of 2011!!

PA310334_w

Isn't it just gorgeous! Hehe!  I opted to go with a less Halloween-ish theme since I didn't get around to carving it until October 31st.  This way I can keep the candle burning well into November - or at least until the pumpkin gets too withered to continue residing on my porch...

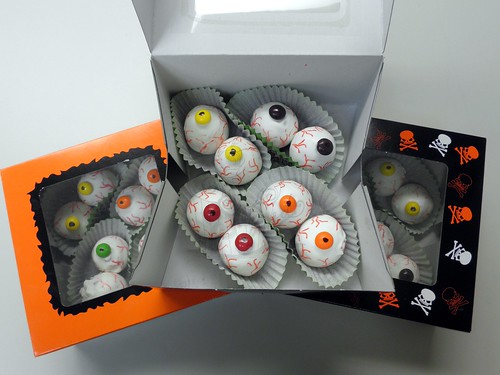
Since Halloween fell on a Monday this year, a lot of the Halloween celebrations took place the previous weekend.  And, I, of course, couldn't slip by without contributing some kind of edible goodness.  How would you have liked to receive one of these boxes?

PA310313_cew

Despite the warning label, there weren't any tricks, just treats inside.  (K picked up these boxes for me awhile back.  Aren't they great fun?)  So what was in the boxes?  Well...

PA310315_cew

Cake eyeballs! My niece and nephew found them to be "cool," though I have a suspicion that some of the other box recipients may have been slightly turned off by the red velvet cake inside.  Perhaps that wasn't the best choice of cake color...nah, who am I trying to kid, it was perfect!

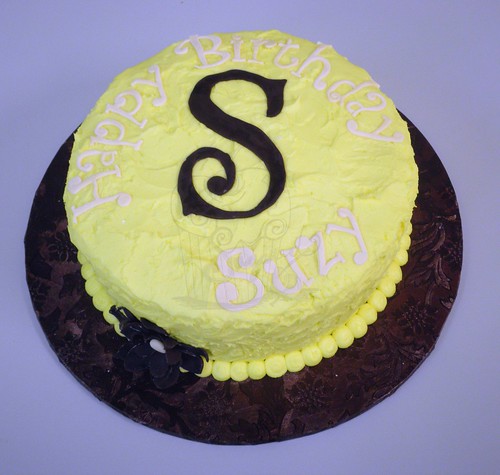
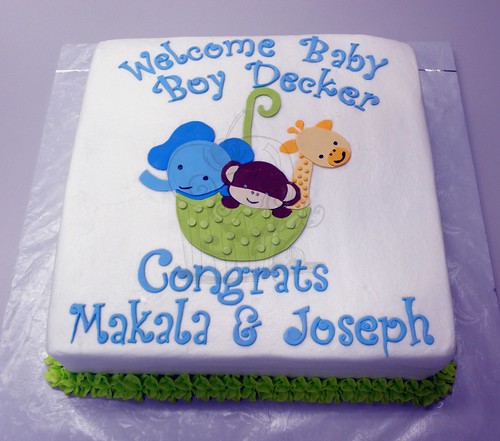
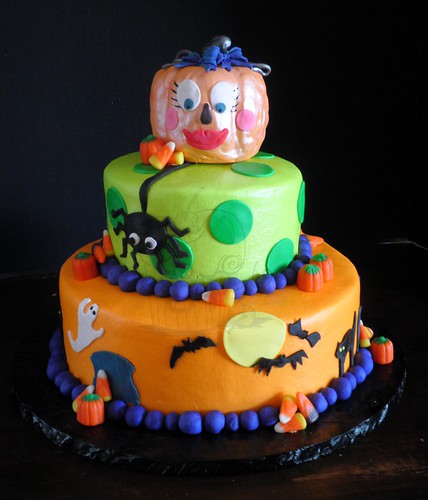
I didn't just make fun treats for the family and friends, I also got to make this fun Halloween themed birthday cake.

PA290246_cew

The pumpkin topper was made from rice krispy treats.  And the candy corn and mini pumpkins were actually candy corn candies.  And, as a bonus, I got to eat the leftover candy! (Not that I needed to, but I did anyway.)

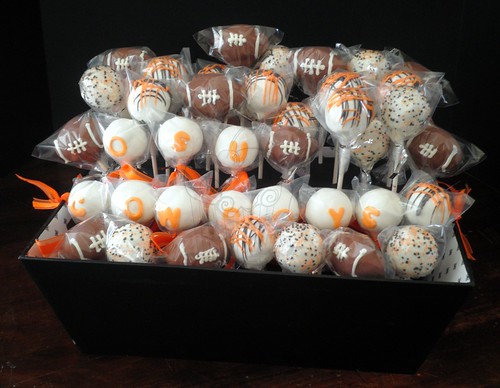
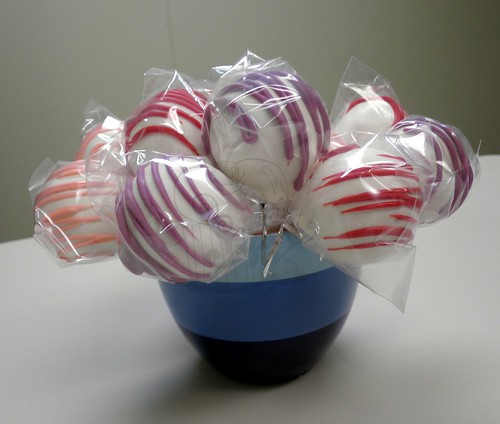
Of course, not everything was pumpkin, ghost, or goblin themed this past week.  I created several other pieces, including these cake pops:

PA310304_cew

I'm happy to say that my cake pop making has improved.  I've made several adjustments, including adding some new "tools" to the process and have been happy with the results.  (Hopefully, I don't end up eating these words when I try to make Oklahoma State University cake pops later this week!)

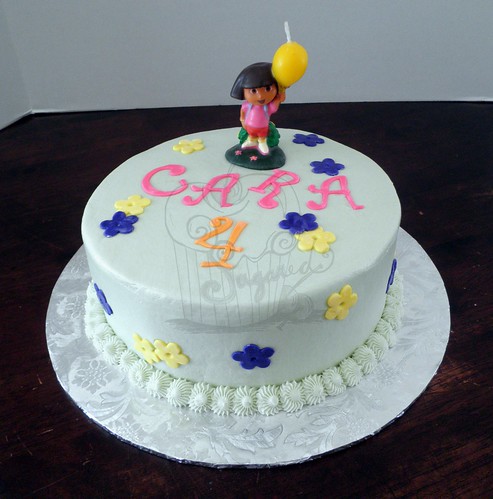
This birthday cake for one of my nieces:

PA300288_cew

This design was fairly simple, but it was a bit of last minute decision to have her party this past weekend.  Luckily, she's a big fan of Dora, The Explorer, and I just happened to have the candle in my supplies!

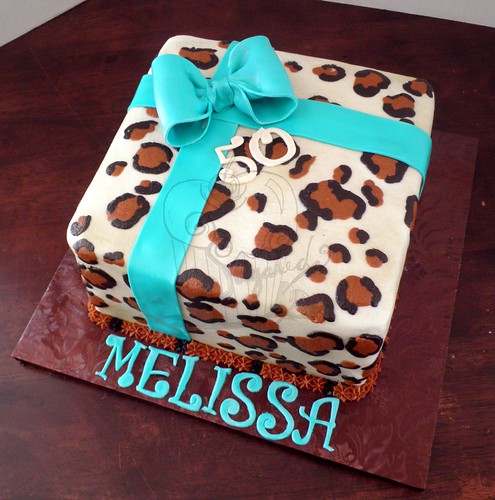
This gift box cake for a 50th birthday:

PA300280_cew

The bow, ribbons, and lettering were fondant, but the leopard print pattern was all buttercream.  The cake was iced in white buttercream, then the spots were added using brown and black buttercream, then I airbrushed over everything (prior to adding the other decorations) with a light bronze sheen.

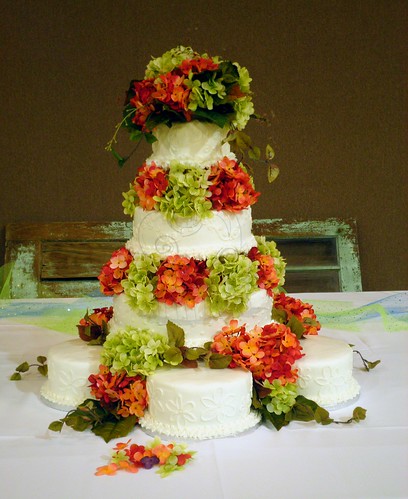
And, finally, the piece de resistance:

PA290258_cew

This wedding cake was a stressful, nail-biting (proverbially speaking) affair for me, but I have to say, it may well be my favorite wedding cake I've done to date.  The cake was iced in white vanilla buttercream, then each layer was decorated with a hand piped design; the hydrangeas were artificial blooms provided by the bride.  So the decoration/design itself wasn't what had me stressed...it was the construction.  Let me explain - those small cakes at the base are actually sitting around a Styrofoam block.  And that Styrofoam block was the support for the upper three tiers of cake!  And, to make things even more interesting, the tiers weren't stacked directly on one another, there was approximately 3 inches of space between each tier to accommodate the flowers.  Stressful?  You bet.  Beautiful?  Absolutely!!

Ciao!

02 November 2011

New! But not yet improved...


There's now a new way to keep up with all the happenings on the blog!  You can subscribe and follow by e-mail!  To do so, just enter your e-mail address in the "Follow by Email" box over on the left, then watch your inbox for an activation e-mail.  Once you receive it and activate your subscription, then you'll start getting an e-mail anytime there's new blog content (though only once daily, even if there's more than one new post).  Hopefully, plenty of you will become subscribers and find it an easy way to follow me!

So, it's an all new way to stay up-to-date, though I must admit, at the moment the e-mails are still fairly plain-Jane.  I am working on ways to spice up the format, but I couldn't wait to share the new feature with you!

Don't forget to subscribe!

01 November 2011

Slow Pour


Waiting for honey to pour from the bottle can sometimes be a test in patience.  But rather than wasting precious minutes, why not try one of the following?  You won't have to spend time watching the honey ooze from the container and the honey will already be warm!
  • If the honey is in a glass container, remove the lid and microwave for 15 to 20 seconds.
  • If the honey is in a plastic container, place the container in a bowl of really hot water and let it sit for a few minutes.
Mmm...tasty!