Advance Notice

No new orders are currently being scheduled.
Showing posts with label Tutorials. Show all posts

21 February 2014

Tutorial: Candy Melt Inscription Transfers

One of the things I dislike most about cake decorating is writing on cakes.  I don't have "pretty" handwriting even on paper.  Is my handwriting distinctive?  You bet.  Is it "pretty?"  Not even close.  And, despite all my schooling, writing in cursive is pretty much not happening, ever.  I print.  Or type.

Aside from worrying about whether the writing is pretty or not, there's also the worry about correct spacing, making sure the words don't run downhill, not misspelling anything (I live in fear of doing this, I don't want to end up on CakeWrecks because of a misspelling)...needless to say, sometimes it takes me longer to get lettering/wording on cake than it does to decorate the rest of it.  It's an exhausting process.

But, one of my methods to help prevent mess-ups and to circumvent the whole "less than pretty" handwriting problem is to use candy melt inscription transfers.  Or in other words, to write on the cake using candy melts.  Although, technically, I don't write directly on the cake...anywho, here's how it works:

How-To:  Candy Melt Inscription Transfers

What You'll Need:
Sheet Pan (or some other smooth, flat surface that is portable,
will hold your design, and will conduct cold well)
Wax Paper
Scotch Tape
Template of the design
Candy melts/wafers in your desired color
Piping bag
Piping tip
Offset Spatula
Iced/decorated cake

CandyWriteTute1

What To Do:
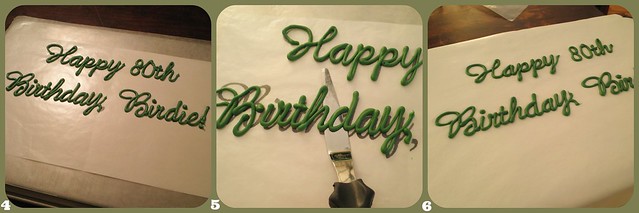
1.  Tape the design template to the sheet pan.  I typically turn the sheet pan over so I don't have to worry about bumping into the edge of the pan while I'm piping the design.
2.  Cover the template with wax paper; be sure to tape the wax paper down so it doesn't move around.  Put the sheet pan (template, wax paper, and all) into the freezer while you melt the candy wafers according to the package directions until smooth.  Place the piping tip in the piping bag, then fill with the melted candy wafers.
3.  Remove the sheet pan from the freezer.  Begin piping over your design template.
CandyWritingTute2

4.  Continue until you have piped the entire design.  Carefully place the sheet pan back into the freezer, freeze until the candy melts have hardened.  Once the transfer is completely set-up, you can remove it from the freezer and keep at room temperature until ready to use.
5.  When you are ready to transfer the design to your cake, place the sheet pan with the design still on it, back into the freezer.  Allow to harden, usually about 10 minutes or so.  Once the design is frozen, remove the sheet pan from the freezer and immediately, but gently, use an offset spatula to loosen the candy melt design from the wax paper.  Work quickly, but carefully; you want the pieces to still be semi-frozen when you place them on the cake.
6.  Once the pieces are loosened from the wax paper, place immediately onto the cake.  Finish decorating, as needed.
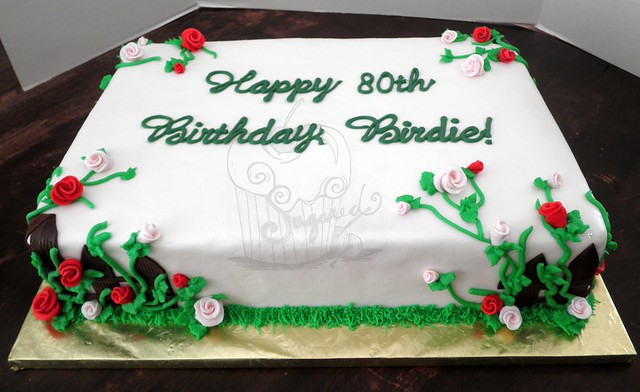
P2080013_cew
Finished cake with candy melt writing transfer.
See, easy peasy.  Nearly any type of writing can be mimicked using this method, and these types of candy melt decorations can be made days in advance or minutes before use.  They really are fairly quick to create once you have all the needed supplies.  You can also use this method to pipe fairly simple design elements (hearts, swirls, monograms, etc) to be used as decorations for cakes, mini cakes, and cupcakes.

You're probably thinking, "why all the freezer time?"  Well, I've discovered that initially freezing the sheet pan makes the candy melts set-up faster, meaning they will hold their shape better rather than flattening out and possibly running together.  Freezing again immediately after piping the design also means that the melts will set-up more quickly, again minimizing the chance of flattening/running.  The final freezer visit ensures that the melts are well set-up and cold enough that the heat from your hands won't cause the design to melt while you are applying it to the cake.

Happy caking!


P.S. You can click on the tutorial photos to see larger versions of them.


15 October 2012

Halloween Cupcake Trio

PA070181_ew

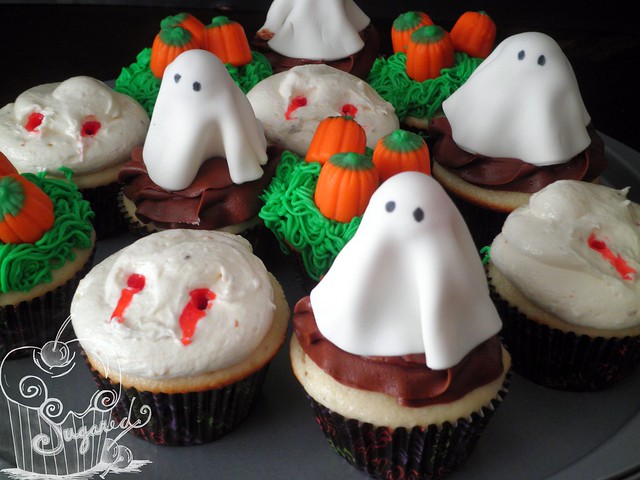
Halloween is just a couple of weeks away!  Have you gotten your costume yet?  I haven't; need to put that on my to-do list, I suppose.  Anywho...maybe you have your costume, but still need an idea for some fun themed sweets?  If so, you are in luck because that's exactly what I have for you today - a trio of easy to create Halloween cupcakes.

First things first, you'll need to bake some cupcakes.  Standard size, any flavor will do.  Got those?  Good.  Moving on to the first cupcake...

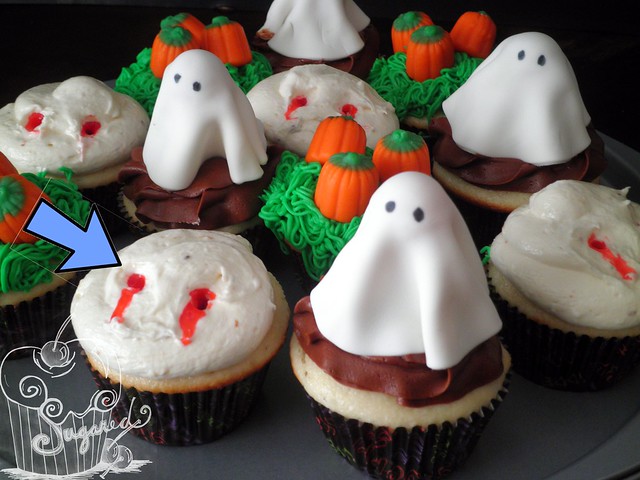
The "Forbidden Bite" as I've termed it.  Or the one next to the arrow in the photo below:

Forbidden Bite cupcake

Forbidden Bite Cupcakes

You will need:
  • Cupcakes
  • Frosting of your choice (I'd recommend either white or a light ivory color and a medium-ish consistency)
  • Red piping gel
  • Lollipop sticks (two to three will be sufficient)
How-to:
  1. Frost each cupcake as flat as possible; it doesn't have to be perfect.
  2. Using the lollipop stick, poke two holes, approximately an inch apart, in the frosting of each cupcake.  Again, you don't have to be perfect.  (You could also use a cookie stick, etc. to make the holes.)
  3. Apply a bit of red piping gel directly over each hole in the frosting, then use a lollipop stick to slightly force some of the gel into the holes, but be careful not to fill the hole in.  Apply another spot of red piping gel just below the holes, and use a lollipop stick to slightly drag the gel downward, creating a "bloody" drip.
  4. Viola!  Forbidden Bite (aka Vampire Bite) cupcakes.
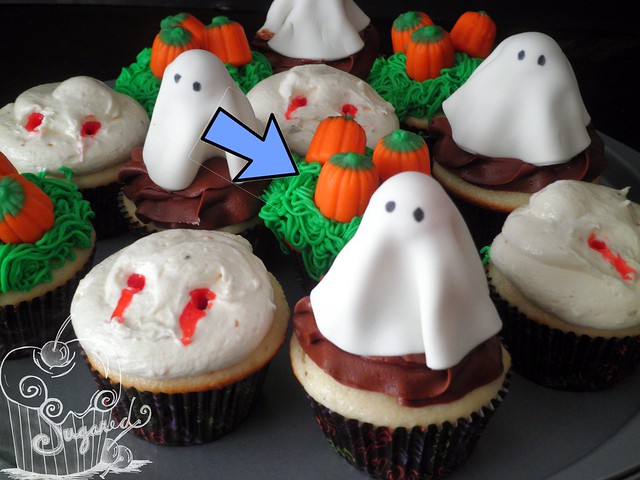
Next up, pumpkin patch cupcakes (again, follow the arrow):

Pumpkin Patch Cupcake

Pumpkin Patch Cupcakes

You will need:
  • Cupcakes
  • Frosting of your choice, tinted green
  • Pumpkin candy corn candies (I used the Brach's Autumn Mix)
How-to:
  1. Using a grass piping tip, pipe the frosting onto the cupcakes.
  2. Apply 2 to 3 of the pumpkin candies to the top of each cupcake.
  3. Viola!  Pumpkin Patch cupcakes.
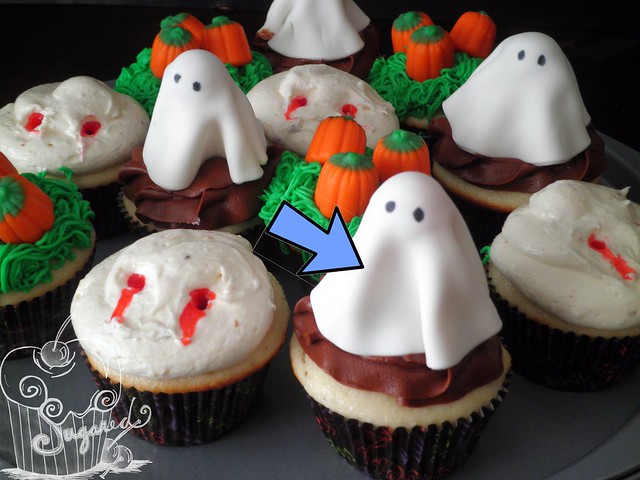
And, the last of the trio, lollipop ghost cupcakes (yep, there's an arrow for this one too!):

Ghost Cupcake

Lollipop Ghost Cupcakes

You will need:
  • Cupcakes
  • Frosting of your choice (any color, flavor, etc)
  • Small lollipops (I used DumDums brand)
  • White fondant
  • Black food pen OR black piping gel
How-to:
  1. Frost the cupcakes.  Any style of swirl, etc will be fine - it's completely left to your creative interpretation!
  2. Unwrap the lollipops and stick one in the center of each cupcake, making sure you press the stick in far enough to go into the cupcake and not just into the icing.
  3. Roll out the white fondant and cut out several 3 to 4 inch circles, only cutting a few at a time to prevent the fondant from drying out while you are working.  Apply a dab of water to the top of each lollipop.  Drape one fondant circle over each dampened lollipop.
  4. Using the black food pen or black piping gel, draw two eyes on the fondant to create a ghost.
  5. Viola!  Lollipop Ghost cupcakes.
Happy haunting!


13 February 2012

Valentine's Marshmallow Pops

I had planned to share the recipe for these beauties with you as fun Valentine's Day baking project.  They look yum, don't they?

Photo:  Food Network Magazine

After all, who can say no to red velvet sandwich cookies with a coconut cream cheese filling?

Unfortunately, the recipe didn't work out nearly as well as I expected, especially considering the glossy magazine spread I'd gleaned the recipe from (see photo above).  My attempt looked nothing like the Food Network chefs' version.  In fact, here's how my cookies turned out:

P2100073_cew

NAILED IT!!  

Haha!  Nowhere even close to comparing to the magazine photo.  I just had to laugh...I knew when I was mixing the dough that the cookies were doomed, but I went ahead and tried them anyway.  I kept thinking the recipe was missing some type of binder, an egg or milk maybe, and apparently I should have added one.  (The reviews I found through Google, after the fact, confirmed my suspicion and gave me comfort that I was not alone in the recipe failure.)  On the bright side, if I ever need a crispy cookie that looks like a ground meat patty, I have the perfect recipe!!  Oh, and the filling really was quite good.

So, as a "Plan B" Valentine's Day edible project, I give you these Valentine's Marshmallow Pops.

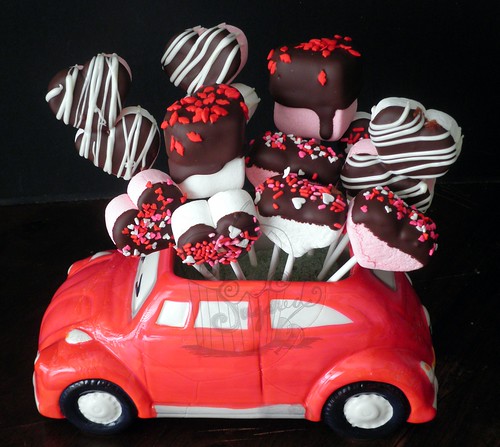
P2120133_cew

Super easy, there's no baking required, and super quick!  I turned out 2 dozen of these cuties in under 30 minutes, not including the drying time.  And, as an added bonus, marshmallows are fat free!  You just have to love a sweet treat that isn't loaded with fat calories, though the sugar count is probably through the roof.  We don't really need to go there, do we?  

I used the Campfire brand "HeartMallows" for these pops, but any brand of heart-shaped marshmallows will work. (One bag yielded about 2 dozen pops.)  Or if you've got the time, you can make your own homemade marshmallows!  Use any chocolate you'd like, white, semisweet, dark, etc, just make sure it's good quality so that it will melt easily and smoothly and set-up well.

Dress them up a bit for gift giving by packaging each one in a small, clear bag tied with a festive piece of ribbon or a silver twist tie.

Valentine's Marshmallow Pops
Yield:  2 to 3 dozen pops, depending on design
Time:  Approx. 30 minutes + drying time

P2120133_cew

Ingredients:

  • 24 to 36, 4" or 6" lollipop sticks (you'll need 6" sticks if you intend to use 2 or more marshmallows per pop)
  • 24 to 36, heart-shaped marshmallows
  • 12 oz good quality chocolate, melted
  • Assorted sprinkles, jimmies, or decos
  • Lollipop bags and twist ties/ribbon, if desired

Preparation:
  1. Gently push one or more heart marshmallows onto a lollipop stick, being careful not to go through the top side of the marshmallow.  Repeat with the remaining marshmallows and lollipop sticks.
  2. Dip each marshmallow pop into the melted chocolate.  Gently tap the excess chocolate off, then sprinkle with the chosen decorations, or drizzle with additional chocolate.
  3. Allow the pops to dry completely.  Depending on how the pops are dipped, you may need to lay them flat on a wax paper lined cookie sheet or stand them upright in a Styrofoam block or drinking glass.  If you are in a hurry, you can place the pops in the refrigerator for a few minutes to speed up the drying process.
  4. Once the pops are dry, you can place each pop into a clear cellophane lollipop bag and tie with ribbon or twist ties, if desired.
Happy Valentine's Day!

27 October 2011

Spider Cupcake Tutorial

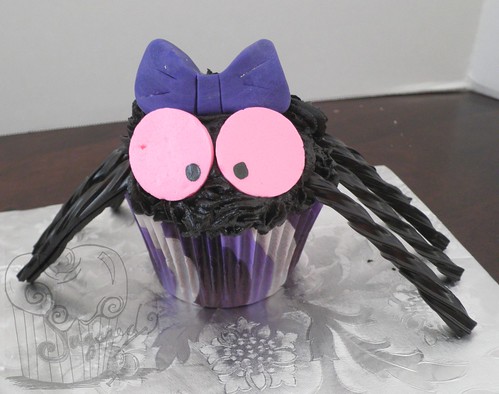
A quick, little tutorial for friendly spider cupcakes.  Here's my version:

PA220178_cew

And here's what you'll need:
  • Cupcakes
  • Frosting
  • Food dye (your choice of color(s))
  • Star piping tip
  • Piping bag
  • Necco wafers or giant smarties
  • Licorice whips or licorice string
  • Fondant, if desired
  • Toothpicks, if necessary
  • Food color pens (only if you already have them!)

How to assemble:

1.  Dye your frosting the desired shade.  (If you are making black spiders, I would suggest starting with chocolate icing, then adding black food dye.  You won't have to use near as much coloring!)
2.  Place the star piping tip into your piping bag.  Fill with the colored frosting and begin piping stars randomly all over the cupcake.  Pull the piping bag straight up to give the spider a "spiky" texture or keep the  tip close to the surface of the cupcake to make the spider look flatter and slightly fluffy.  Alternatively, for a different look, you can also pipe random strings, still using the star tip, all over the cupcake.  (This is the method I used on the spider in the picture.)
3.  Cut licorice to the desired length for the legs of the spider.  Push them into the icing, then place additional small dabs of icing on top of the licorice to help hold it into place.  If you find the legs will not stay affixed, you can use toothpicks to hold them.  Just be sure that you tell everyone who will be eating the spiders that they need to be careful of the toothpicks!
4.  Place two Necco wafers or giant smarties at the front of the cupcake.  Using either a food color pen or a toothpick and your food dye, place a small dot on each wafer for the spider's eyes.
5.  Add any additional fondant or buttercream details.  Some ideas might be bows (as in the picture), fangs, or even hats...you're only limited by your imagination!

Happy baking!


04 October 2011

How-To: Roast Pumpkin Seeds


It's October! Which means one of my favorite holidays is coming up...Halloween!  If you're planning to carve a pumpkin this year, don't throw away those pumpkin seeds.  Keep them to roast - they make a delicious low-carb snack and by roasting your own, you can choose to flavor them nearly any way you like, though they are yummy without any extra seasoning.  

Here's how:
You'll need: 
  • pumpkin seeds (or any squash seed)
  • a small amount of oil or butter (if adding seasoning)
  • any seasonings of your choice.

1.  Preheat the oven to 250°F (or 350°F for quicker roasting, but you'll have to keep a close eye on the seeds!).
2.  Wash any pulp off the seeds, then pat dry with paper towels.  If you're not seasoning seeds, skip step 3; go directly to step 4.
3.  If you're going to season your seeds, toss them with the oil or butter.  (Don't over do it though; adding too much oil will result in greasy seeds, usually 1 1/2 to 2 tablespoons per 2 cups will be plenty.)  Add seasonings, then toss to coat.  
4.  Lay the seeds in a single layer on a parchment paper covered baking sheet.
5.  Bake seeds for 45 to 60 minutes, or until they are no longer soft and have begun to brown around the edges.  Stir occasionally to ensure even roasting.

Some ideas of seasonings to try:
  • Olive oil and salt
  • Butter, garlic salt, and Worcestershire sauce
  • Butter and pumpkin pie spice
  • Butter, sugar, and cinnamon
Mmm....tasty!


30 August 2011

How-To: Toast Nuts


We've all done it...come across a recipe that calls for TOASTED pecans, almonds, or some other type of nut.  And instead of taking the time to toast them, we just toss nuts straight from the package into the recipe.  But, I beg of you, next time...DON'T!  It doesn't take long to toast nuts (usually only about 15 minutes tops) and the results are magical!  Toasting nuts allows the flavor and texture to deepen, and also makes them easier to chop, crunchier, and less likely to sink in batters and mixes.

If you've never toasted nuts before - don't be intimidated!  There are several ways to accomplish the task, in fact, you can even use the microwave!

Toasting Nuts - Microwave Method
Spread a single layer (approximately one cup) of nuts on a microwave safe plate.  Cook on high power in 1 minute intervals until the nuts begin to smell and taste toasted.  **Microwave toasting will not yield the beautiful deeper brown you get from pan or oven toasting.

Toasting Nuts - Pan (i.e. stove top) Method
Heat a large skillet on medium high heat.  When the pan is hot, add a single layer of nuts.  Do not add any oil or cooking spray - the nuts have enough natural oil to cook sufficiently without sticking.  Cook until the nuts begin to smell toasted and have turned a pleasing golden brown color.  Remove from heat.

Toasting Nuts - Oven Method
This is the method I use most often...and is recommended for making large quantities.
Preheat the oven to 350°F.  Spread the nuts in a single layer on a baking sheet.  Bake according to the chart below or until the nuts begin to smell toasted and have turned golden brown.  You may wish to stir the nuts or turn the pan halfway through the cooking time to help ensure even toasting.

Nut Type Suggested Time
Almonds, sliced 7 - 10 minutes
Almonds, whole 10 minutes
Chestnuts 25 minutes
Hazelnuts 12 - 15 minutes
Macadamia Nuts 12 - 15 minutes
Mixed Nuts 15 - 20 minutes
Peanuts (in shell) 15 - 20 minutes
Peanuts (shelled) 20 - 25 minutes
Pecans 10 - 15 minutes
Pine Nuts 5 minutes
Walnuts 10 - 15 minutes

23 August 2011

How-To: Roast & Steam Peppers


Love the taste of roasted peppers, but hate having to shell out for the jarred ones at the grocery?  If so, try this tasty tip!

To Roast Peppers:
  • Preheat your oven's broiler OR turn your heat source (i.e. an open flame on a gas stove, outdoor grill, or even a campfire) to HIGH.
  • If desired rub the peppers with a couple of tablespoons of oil. Do Not use extra virgin olive oil due to its low smoke point.
  • If using the broiler, place the peppers on a baking sheet; then broil until skins begin to appear charred in spots.  Using tongs, turn the peppers, and repeat the broiling process until the skins begin to blister/char evenly on all sides.  
  • If using an open flame, grab a pair of tongs and your first pepper, then pass the pepper through (or as close to) the open flame as possible.  Turn the pepper and continue passing through the flame until it is evenly charred.  (Times will vary widely depending on the type of pepper and your heat source, so don't wander off!)
To Steam & Clean Peppers:
  • Immediately after charring the skins, place the peppers in a zippered storage bag along with a damp (not wet) paper towel or two.  Seal the bag tightly and allow to steam for 10 to 15 minutes, or until the peppers are cool enough to handle.
  • Remove the peppers from the storage bag and peel away and discard the charred skin.  Most of the skin should slip off fairly easily, but if it doesn't, don't fret, it will add additional flavor!
  • Once the skins are removed, pull the stems out of each pepper, then invert the pepper over a bowl and use your hand to squeeze out the bulk of the seeds and pulp.
  • Slit the peppers open with a knife and spread them out ribbed side up.  Using the backside of your knife, scrape out any remaining seeds, ribs, and/or membrane.
  • Use the peppers in your favorite recipe or store them for future use.* 
Mmm....tasty!


*I'd recommend freezing the peppers in a single layer on parchment paper, then placing in a zippered storage bag.  They'll keep for several months this way.  Or if you're into canning, use either regular olive oil or balsamic vinegar to cover them.  Keep in mind - the olive oil won't leave behind much added taste and can be (mostly) rinsed off, the balsamic vinegar will leave its mark though!

09 August 2011

How-To: Peel a Hard-Boiled Egg


Raise your hand if you've ever had trouble peeling a hard-boiled egg.  *Raising hand.*  Yep, I admit, I too have had this problem before.  And the solution?  A fairly simple one, though it involves more than just how you handle the eggs AFTER cooking.

Step 1:  Make sure the eggs you will be using are less than perfectly fresh.  By this, I mean that you want the eggs to be at least several days old...fresh eggs are nearly impossible to peel because very little air passes through the eggshell.

Step 2:  Bring your less than perfectly fresh eggs to room temperature or, if you're short on time, place them in a bowl of warm water for 5 minutes.

Step 3:  Cook according to your preference/recipe.

Step 4:  When the timer dings, run cold tap water into the pot until the eggs are cool enough to handle.

Step 5:  Tap the ends of the egg on a hard surface, then roll the egg on the counter top to crack the rest of the shell.  Peel the cracked shell away from the egg under COLD running water.

Step 6:  Enjoy your handiwork!

04 August 2011

Oops! I Did It Again...

Perhaps some of you recall this post.

If so, you are probably already shaking your head in wonderment, amusement, or horror.  Maybe even thinking to yourself, "How could she possibly endure that a second time?"

Well, the good news is, I did and the results were amazing!  That's not say there weren't some bumps in the road (remember that new cake toy I've been referring to?), and that I (and K too) didn't lose lots and lots of sleep, but the end product was well worth it.  Don't get me wrong, I'm not in a hurry to do it again unless I've got an extra sous chef or two on hand, lots of extra space, and no other demands on my time, but its nice to know that I've got the chops to make it happen if I wanted.

As it stands, without the help of K and Hunny's I would have never gotten everything done in time.  You are all absolute lifesavers and your support and willingness to help me out means a great deal.  Thanks for everything!

So...care to see the cakes?

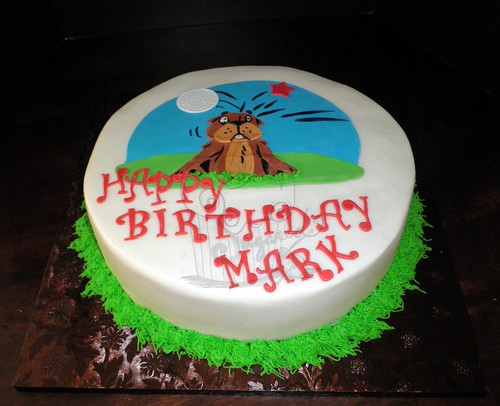
A Caddyshack inspired birthday cake:

P7290746_cew

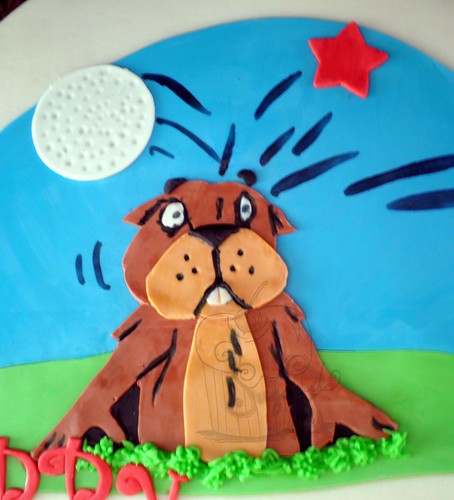
The gopher is made from fondant pieces layered together.  I added a few hand painted details to liven it up a bit more.  Here's a closer look.  The gopher's expression never fails to make me giggle a bit...

P7290756_cew

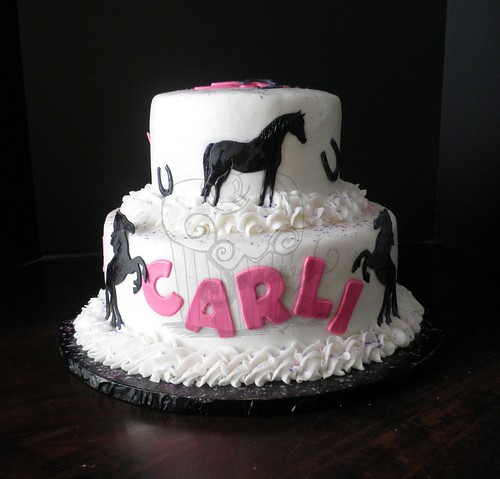
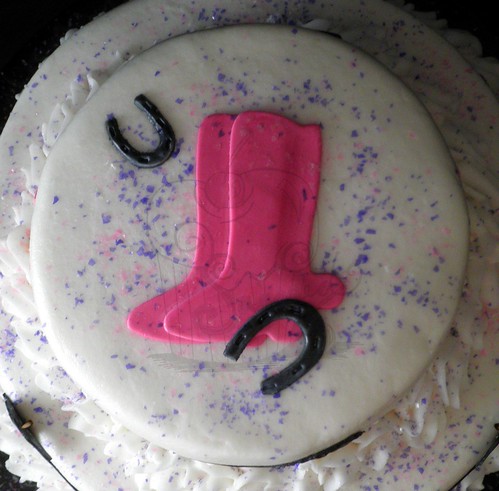
This next cake was for the daughter of one of my best friends.  I just couldn't refuse the opportunity to make her birthday cake.  The birthday girl had very specific requests for the cake, including a rearing black horse and horseshoes and spurs around the bottom of the cake.  I added the pink boots (rather than the spurs) and edible glitter to give it some color and to match her sparkly attitude.

P7290768_cew

P7290771_cew
(Top View)
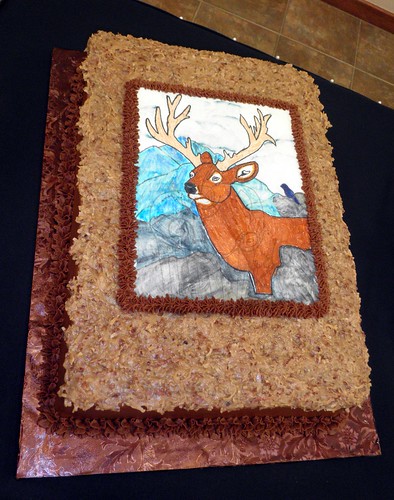
Here's the groom's cake for the first wedding of the weekend.  It is a German chocolate cake with homemade coconut pecan icing.  The deer "painting" is a gumpaste plaque painted with edible food color.  And, just for the record, German chocolate cakes are a bit of challenge to decorate - you still want to be able to see the lovely color of the frosting, but at the same time you don't want just a giant slab of brown.  This was a good compromise...

P7300783_cew

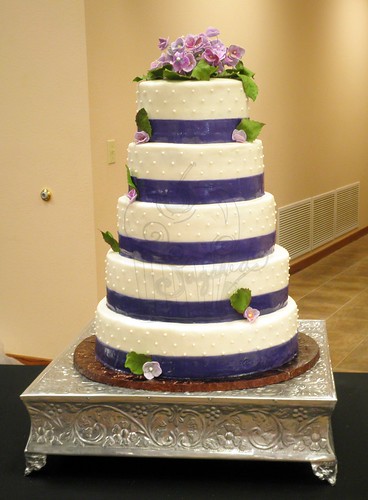
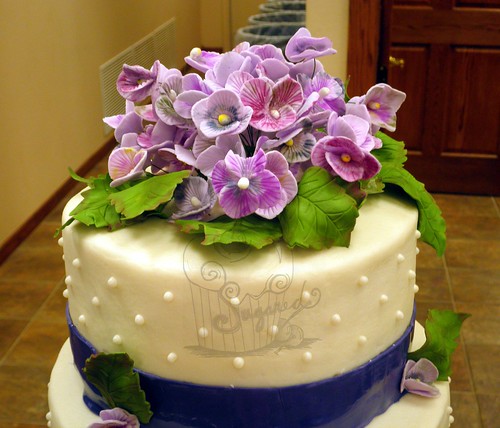
And here's the wedding cake!  It was a gorgeous five tier cake done in ivory buttercream with a Swiss dot pattern, purple fondant ribbons, and gumpaste hydrangeas.

P7300784_cew

I tried my hand at making gumpaste hydrangeas for this cake.  They were fairly easy to create, though I should have made nearly double what I did!  The hardest part was deciding how best to join the individual blooms to achieve the overall round appearance.

P7300786_cew

If you want to try your hand at making your own gumpaste hydrangeas, Jacqueline over at The Petalsweet Blog has a fabulous three part tutorial.  I highly recommend it!

The cakes for the second wedding of the weekend were great fun to create; they were a bit out of the ordinary, but were a perfect fit for the couple.  (Don't ask K's opinion on this (the fun part), we had a hiccup along the way, but I believe the cakes turned out better for it.)  

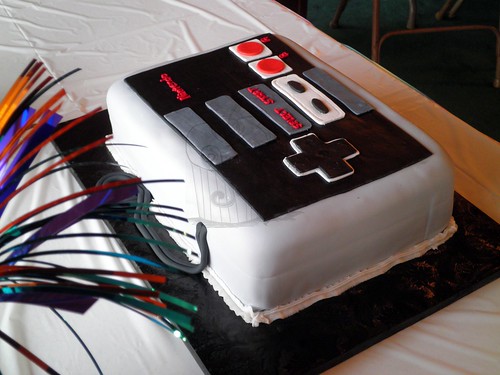
The groom's cake was K's favorite of the weekend...after all, who doesn't love the classic Nintendo game system?

P7300807_ew

It was done in fondant, with all of the pieces being hand cut.  The only buttercream on the cake was the writing on the controller and the cake's border.  The connection cable was a last minute addition, but it adds an extra dose of "realistic" to the cake.

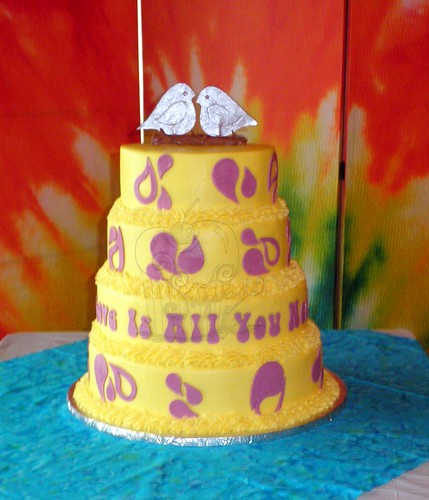
And here's the wedding cake!  The phrase on the third tier reads "Love Is All You Need."  The cake was topped with a pair of gumpaste "love" birds atop a tree branch.  

P7300791_cew

The table setting and backdrop for this cake were an excellent complement.  They really helped the cake stand out amid the room's other decorations.

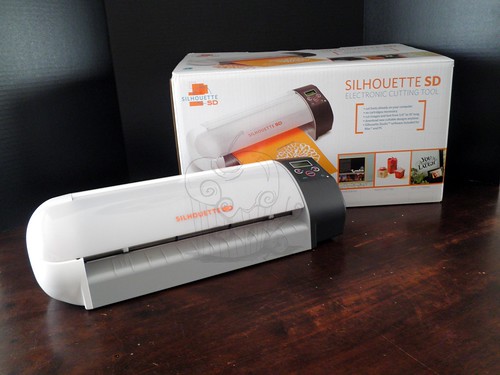
That's all the cakes, but here's a picture of my latest cake toy.  I am sad to say that as of this writing, I have yet to conquer and make it create anything usable for a cake.  The learning curve is steeper than I anticipated.  I will persevere until I figure it out though...I might even end up getting a new laptop out of the deal. He-he!

P7310813_ew

Whew! I am tired!  Kinda of long post today, huh?  Think I'll go take a nap...

22 April 2011

Hey Peeps!

Easter is almost here!

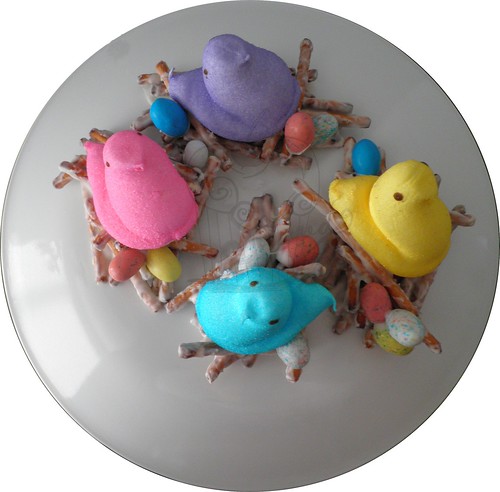
Are you still in need of a fun (and quick) Easter themed dessert?  Do you love Easter candy?  If so, have I got a treat for you.  And you only need four ingredients...one of which is the perennial favorite, Peeps!

P4210078_w

These only take about an hour to make, start to finish.  They involve no measuring and very little prep work - actually the only thing you have to do before beginning assembly is melt the chocolate.  Doesn't get much easier than that!  And as an added bonus, the assembly process is very kid friendly, so it's a great opportunity to involve the whole family.

Bird Nests
Yield:  Approximately 36 Nests

Ingredients:

  • 2 - 12 oz bags white chocolate chips
  • 1 - 16 oz bag pretzel sticks
  • 40 Peeps candies
  • 1 bag mini candy eggs (I use Mini Robin's Eggs)

Preparation:
  1. In a large bowl, melt the white chocolate chips; set aside approximately 1/2 cup.
  2. Stir the pretzel sticks into remaining chocolate until well coated.  (You'll have some breakage, but don't fret, it adds to the "nest" look.)
  3. Place 36 scoops of the pretzel and chocolate mixture onto wax paper.  Use either your (clean, freshly washed) hands or two forks to arrange each scoop into a 3-inch nest.
  4. Dip the bottom of a Peep candy into reserved white chocolate and place onto each nest.  Use melted chocolate to attach candy eggs.  (Reheat the chocolate if it becomes difficult to work with.)

peepNest_cw

Happy Easter!


05 January 2011

Melted Snowmen

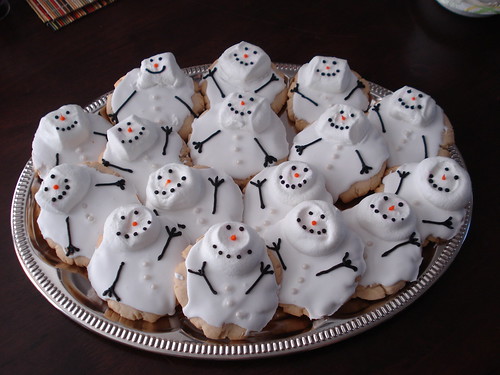
I've had several inquiries about how I made the melted snowman cookies from my December 29 post.  For those of you who might have missed it, here's a picture of the cookies:

DSC04136

Aren't they the cutest idea? And a very novel one to boot!  I must admit, though, that these cookies aren't an original of mine.  I first came across the idea on the Truly Custom Cakery's Blog, and just recently I learned that Stacey of Truly Custom adapted the idea from Meaghan of the Decorated Cookie.  Thank you, ladies, for your inspiration and Truly Custom Cakery for your excellent tutorial!

For those of you who want to make your own melted snowman cookies using the Truly Custom Cakery's tutorial, click here.  The tutorial looks long, but I assure you, these cookies are easy to make!  They would make an excellent project for younger kids to help out with, and they offer plenty of opportunity for personalization and individual snowman personality to shine through!  As an added bonus, you can use whatever sugar cookie recipe you prefer...maybe even a store bought dough if you don't want to start from scratch.  My snowmen were fairly simple in decoration because I was pressed for time, but you could use buttercream or royal icing to add scarves, hats, or bowties.  You could also explore different types of buttons - maybe mini chocolate chips or large shaped sprinkles...endless possibilities!

Happy baking!