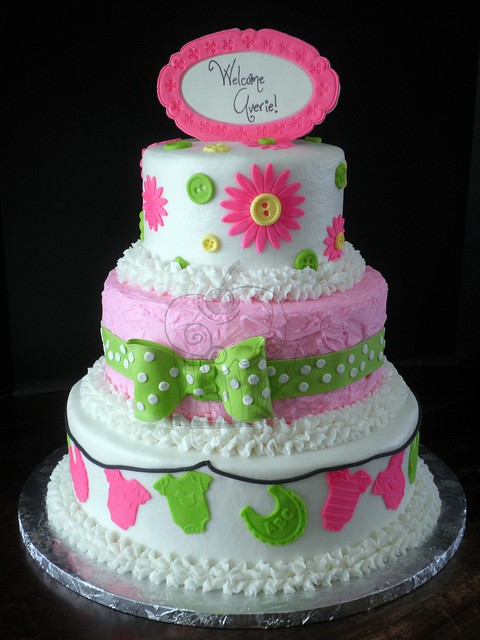
Advance Notice

No new orders are currently being scheduled.

31 October 2012

Trick or Treat

Give me something good to eat!

PA300498_cew

Thought I'd tempt you with a few of the Halloween treats I made this year - sugar cookies, homemade candy corn, and "blood" spattered red velvet cake balls.  Yum, yum!  Oh, and don't forget the orange and black vodka.  It's only for those of age though, sorry kiddos.

Celebrate safe and Happy Halloween!

30 October 2012

Onions & Potatoes


Don't store onions and potatoes together in close quarters.  They can each cause the other to spoil faster than if they are stored alone.  One exception - if you have a storage space with plenty of dry, cool air circulation.

Oh, and both onions and potatoes last longer in dark places, too, so keep them away from direct sunlight.

Mmm...tasty.

26 October 2012

I Want To Suck Your Blood

Not literally, of course.  And, admit it, you read that title in an old school Count Dracula voice, didn't you?

There will be no literal blood sucking today, friends.  But...I am going to give you a recipe for making your very own sugar blood from corn syrup.  Yes, it is as fun as it sounds and it's perfect for your upcoming Halloween party!

A couple of caveats - Number 1:  it's sticky stuff.  Seriously sticky, so just stay aware of that as you are splattering it about and garnishing glasses and platters and such.  And Number 2:  it's a bit messy.  But, honestly, aren't most of the really good/fun things in life?

Here's just a tiny example of the fun you can have with this stuff!

PA230336_cew

Bet you're wondering where I came up with a glass that offers you a chance to name your poison, huh?  Turns out I have an entire set of them...everything from Arsenic to Carbolic Acid to Paris Green; found them at a thrift store.  Oh the things you can find in places like that!  And yes, that is a ceramic skull wearing a hat in the background.  He's actually a candle holder; been in the family for years and part of a matched set.  He and his buddy used to welcome visitors to the haunted houses the fam once hosted in days gone by...aw, the memories!

Anyway, moving on to the recipe for corn syrup blood...

Corn Syrup Blood
Yield:  Approx 1/4 cup

Ingredients:
  • 1/4 cup light corn syrup
  • 1 tsp molasses, preferably blackstrap
  • Red food coloring, approx 1/2 tsp
Preparation:
  1. Stir together the corn syrup and molasses in a small bowl.  Add the red food coloring until desired shade of red is reached.
  2. Have fun using the "blood" to decorate and garnish!  Store in an airtight container if not using immediately.
Gory goodness!

25 October 2012

Life, A Condensed Version

Nope...no birds and bees discussion today, sorry kiddos.  We won't be getting that in depth with the explanation of life, the use of "condensed" in the title should have tipped you off to that one.  In fact, we're going to jump right into the middle - after you've found the love of your life, dated, gotten married, yadda, yadda, yadda.

Fast forward a few years - the kids are starting to grow, form opinions of their own and just generally behave like little monsters...

PA120227_cew

Not that all children do, of course, I just needed a way to tie this cake into the post.  I'm sure there are plenty of ALWAYS wonderfully and perfectly behaved children out there; let me know when you find one that meets the "always" condition. Hehe!

Of course, with the children growing, they start getting involved in a plethora of activities.  Activities that require stuff...lots and lots of stuff.  All of which is usually handed to Mom with a "will you hold this for me" statement.  Leading to the giant purse or tote is strangely similar to Mary Poppins' magic bag.

PA120244_ew

Which when spilled might reveal everything from a ballet pointe shoe to a "Margarita Madness" punch card.  Don't judge, sometimes mommy needs her "me time."

All that chasing the kids will likely leave you exhausted and ready for some downtime.  Maybe cheering on your favorite team with an icy cold beverage and a slice or two?

PA120279_ew

Notice, I said "YOUR" favorite team, not mine; that cooler is entirely the wrong color and logo for my tastes, I'd much prefer something in "America's Brightest Orange."

Though, if you're really lucky, you'll be doing all of preceding with your favorite person in the world and in the blink of an eye, you'll be celebrating your 40th wedding anniversary.

PA190307_cew

Nothing like life-long love!  Did you know rubies are the traditional gift for the 40th Anniversary?  Hence the ruby red roses on the cake.

And, there you have it, one of the hundreds of possible short and sweet condensed versions of life.

Better get to living!


23 October 2012

Keep Guacamole Green


I love homemade guacamole, but I hate the less than appetizing brown shade it turns after it's been made.  Why does it go from green and healthy looking to brown sludge?  And, more importantly, how can the color-change process be slowed down or stopped?

First things first, guacamole turns brown due to exposure to oxygen.  The oxygen sets off a chemical reaction in catechol, a naturally occurring chemical in the fresh fruit, turning the catechol into o-benzoquinon.  The o-benzoquinon then helps to protect the fruit from prematurely spoiling.  But it is the o-benzoquinon that is the cause of the browning.  (It's also the culprit behind the browning of apples, potatoes, etc.)  So, why does guacamole brown so much faster than apples or potatoes?  Because of a little compound known as PPO (polyphenol oxidase).  PPO serves as the catalyst for the entire reaction, and avocados contain a relatively high amount of PPO, causing them to brown very quickly.

So, how to reduce the browning?  There are several different methods on how to do so, the most common being adding an acid of some sort (i.e. lemon juice or lime juice).  Adding lemon/lime juice does help to slow down the chemical reaction, but if the guacamole is going to be stored for a day or two, it will still turn brown.  For longer storage, it's best to minimize the fruit's exposure to oxygen.  Do this by pressing a layer of plastic wrap directly onto the surface of the guacamole, then tightly sealing the storage container.  The guacamole should stay green for several days this way.

Extra tip:  pressing plastic wrap to the surface of custards or puddings will stop these dishes from forming a tough "skin" while in the refrigerator.

Mmm...tasty!


18 October 2012

Pink & Blue & Halloween, Too!

First, the pink:


PA060129_ew

An adorable baby shower cake to welcome a new baby girl.  I think this may be one of favorite cakes I've done in a while, and I'm not even a huge fan of the color pink!  Everything was edible, even the bow and topper.

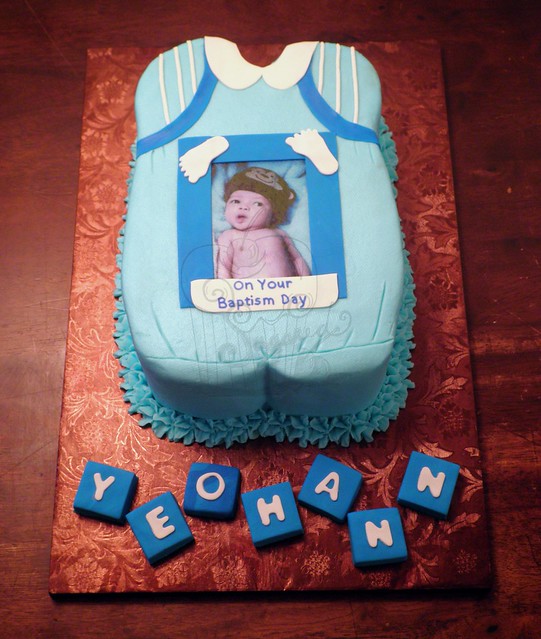
And, then on to the blue:

PA060094_cew

A baptism cake that was designed to match the photo frame party favors; buttercream finished with fondant accents and an edible image.  I apologize for the less than stellar lighting in the photo, but this time it wasn't caused by me being up until 1 AM; this time it was caused by an overcast day, they (referring to the meteorologists) even forecasted rain for us that day.  It didn't happen, but it gave us hope...

Or how about both blue and pink together on the same cake?

PA060107_cew

I tried a petal icing technique on this cake; it's done using piped buttercream dots, piping one line of dots at a time, then elongating each dot with the tip of a spatula or knife.  A time consuming method and a test of your ability (*cough, cough*) to keep making straight lines and even sized buttercream dots.  But, it does give a fun look and it's something a bit different.  The flowers are simple, stylized versions of anemones.  Oh, and I wouldn't recommend painting/dyeing floral stamens black...you'll end up with more paint/dye on your hands than on the stamens.  Desperate times, people, desperate times.

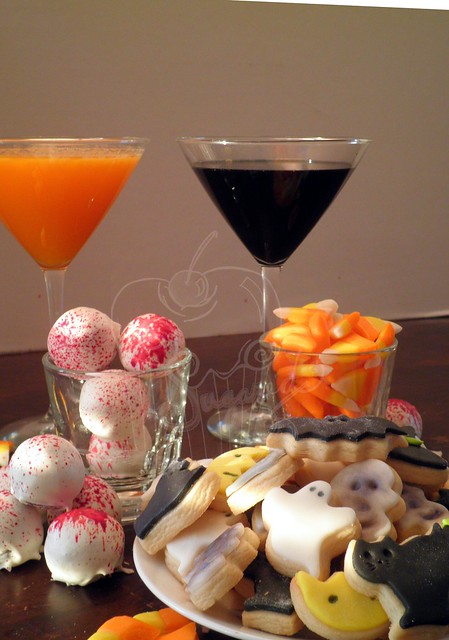
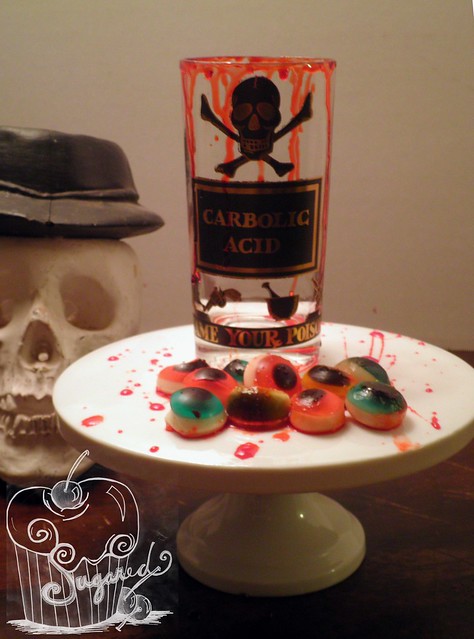
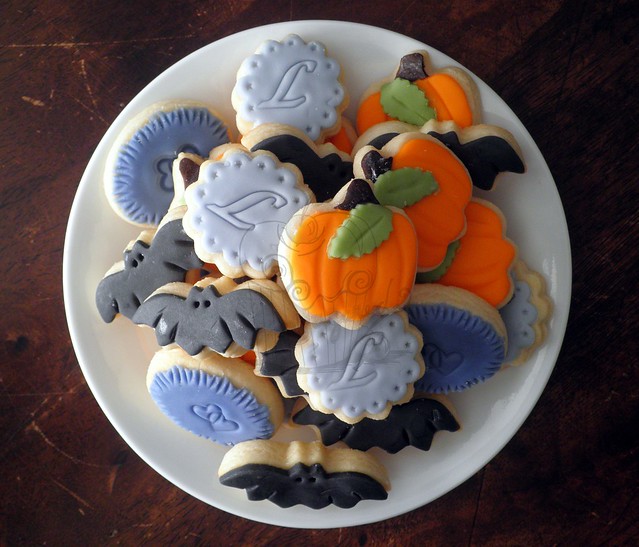
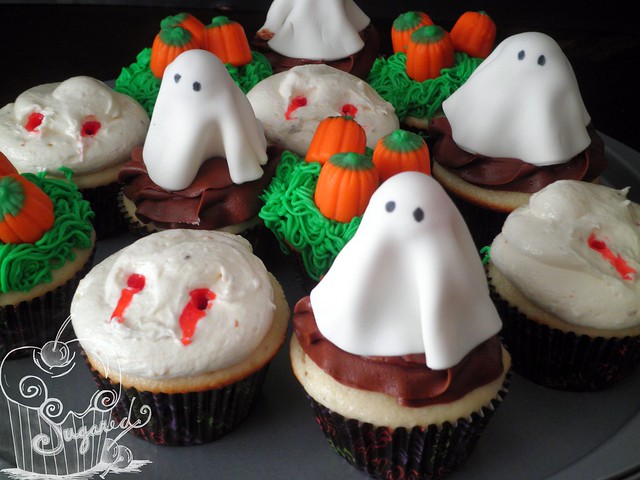
Now, on to the Halloween goodies!

Cookies for a wedding reception:

PA040081_cew

Yep, I said wedding reception, and yes, those are black bat cookies.  I didn't get the opportunity to meet the bride and groom, but let me just say...those two may well have been the coolest wedding couple I've worked with.  I know, I know...quick to judge and all, but I was able to see a few photos the reception - the cake was beautiful (purple and black with bats!), the punch bowl was a cauldron, and the floral arrangements were in pumpkins rather than vases...I mean seriously, how cool is that?! 

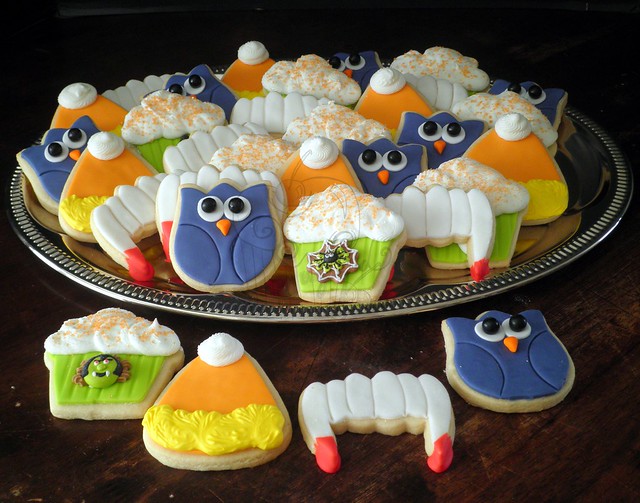
And, one last set of Halloween cookies:

PA080188_cew

These were to celebrate October birthdays, so I didn't want to go TOO overboard with the Halloween theme, hence the party hats that were supposed to look similar to candy corn (not sure that was one of my best translated efforts...) and the purple owls.  I couldn't resist using my recently acquired fang cookie cutter though and I just happened to have a few Halloween decos from a recent project so I made sure to add them to the cupcakes.

Talk to you soon!

16 October 2012

Pumpkin Swap


Prefer the taste of sweet potatoes to the taste of pumpkin?  If so, feel free to swap them in most recipes!  Just use the same amount of canned sweet potato puree.

Can't find canned sweet potato puree?  Make your own:  prick whole sweet potatoes with a fork, microwave until soft (about 20 minutes), scoop out the flesh and mash or puree until smooth.  One note - the homemade stuff tends to be drier than the canned stuff, but you don't need to add any extra liquid, it'll still work perfectly fine in the recipe.

Mmm...tasty!


15 October 2012

Halloween Cupcake Trio

PA070181_ew

Halloween is just a couple of weeks away!  Have you gotten your costume yet?  I haven't; need to put that on my to-do list, I suppose.  Anywho...maybe you have your costume, but still need an idea for some fun themed sweets?  If so, you are in luck because that's exactly what I have for you today - a trio of easy to create Halloween cupcakes.

First things first, you'll need to bake some cupcakes.  Standard size, any flavor will do.  Got those?  Good.  Moving on to the first cupcake...

The "Forbidden Bite" as I've termed it.  Or the one next to the arrow in the photo below:

Forbidden Bite cupcake

Forbidden Bite Cupcakes

You will need:
  • Cupcakes
  • Frosting of your choice (I'd recommend either white or a light ivory color and a medium-ish consistency)
  • Red piping gel
  • Lollipop sticks (two to three will be sufficient)
How-to:
  1. Frost each cupcake as flat as possible; it doesn't have to be perfect.
  2. Using the lollipop stick, poke two holes, approximately an inch apart, in the frosting of each cupcake.  Again, you don't have to be perfect.  (You could also use a cookie stick, etc. to make the holes.)
  3. Apply a bit of red piping gel directly over each hole in the frosting, then use a lollipop stick to slightly force some of the gel into the holes, but be careful not to fill the hole in.  Apply another spot of red piping gel just below the holes, and use a lollipop stick to slightly drag the gel downward, creating a "bloody" drip.
  4. Viola!  Forbidden Bite (aka Vampire Bite) cupcakes.
Next up, pumpkin patch cupcakes (again, follow the arrow):

Pumpkin Patch Cupcake

Pumpkin Patch Cupcakes

You will need:
  • Cupcakes
  • Frosting of your choice, tinted green
  • Pumpkin candy corn candies (I used the Brach's Autumn Mix)
How-to:
  1. Using a grass piping tip, pipe the frosting onto the cupcakes.
  2. Apply 2 to 3 of the pumpkin candies to the top of each cupcake.
  3. Viola!  Pumpkin Patch cupcakes.
And, the last of the trio, lollipop ghost cupcakes (yep, there's an arrow for this one too!):

Ghost Cupcake

Lollipop Ghost Cupcakes

You will need:
  • Cupcakes
  • Frosting of your choice (any color, flavor, etc)
  • Small lollipops (I used DumDums brand)
  • White fondant
  • Black food pen OR black piping gel
How-to:
  1. Frost the cupcakes.  Any style of swirl, etc will be fine - it's completely left to your creative interpretation!
  2. Unwrap the lollipops and stick one in the center of each cupcake, making sure you press the stick in far enough to go into the cupcake and not just into the icing.
  3. Roll out the white fondant and cut out several 3 to 4 inch circles, only cutting a few at a time to prevent the fondant from drying out while you are working.  Apply a dab of water to the top of each lollipop.  Drape one fondant circle over each dampened lollipop.
  4. Using the black food pen or black piping gel, draw two eyes on the fondant to create a ghost.
  5. Viola!  Lollipop Ghost cupcakes.
Happy haunting!


09 October 2012

Slow Cooker Liners


We had our first could snap here last weekend! Yay!  I, of course, immediately dug out the crock pot and made soup...I'm looking forward to colder weather, can you tell?  The point of that little story, is to introduce you to these babies:


Yep, slow cooker liners.  They are exactly what you think they are - nifty drop-in (for lack of a better word) bags that keep your slow cooker considerably cleaner than going without.  Remember the last time you cooked your favorite crock pot meal and then had to soak the cooker insert and scrub off all the baked on residue?  These will help you save all that elbow grease and time!  You can spend that time and energy doing something you actually want to do - maybe eat dessert, catch up on an episode or two of your favorite new show...

Mmm...tasty!
*No compensation was given for my good words; just a product that I love and wanted to share!


03 October 2012

Snail's Pace

I only have one cake to share with you today.  *Gasp*  I know, it's quite shocking, but just wait until you see the cake - you'll likely swoon with the sweetness of it.

Here's the topper:

P9290029_cew

I mean, seriously, how cute is she?!  I modeled her myself from gumpaste. *big smile*  

But, don't let her adorableness fool you.  I came very, very close to chucking her smirking, pink and yellow self across my kitchen.  Don't judge...I had to rebuild her from scratch twice, then about the time I thought I had a successful base, her head (the 2nd attempt) split down the middle requiring a third effort.  The splitting head could have had the perfect horror movie-ish effect, just needed a bit of fake blood really, maybe some brain matter...hmm...oh sorry, I digress, but it is October after all.  I'm in a Halloween frame of mind, sorry.

Anyway, after the headache (get it?) the main body gave me, I figured it'd be smooth sailing from there.  Wrong!  Turns out sculpting a snail's shell that doesn't look deformed is not an easy task.  Fast forward an hour and 30 minutes later and I was finally successful!

P9290019_ew

Viola!  Complete and utter cuteness.

Bonus points if you can name what line of toys the snail is modeled from.

Talk to you soon!

02 October 2012

Time Saver: Peel Garlic Faster


To peel garlic faster:

Press down firmly on the clove with the side of a chef's knife.  The peel will split and slide right off.

Mmm...tasty!