Advance Notice

No new orders are currently being scheduled.
Showing posts with label Savory Eats. Show all posts

10 April 2013

Bits-N-Pieces

No fancy cakes or cookies in this post, but there are quite a few yummy foods present.  I've been cooking lately - not just baking!  It's a bit of a strange feeling, but I love to cook, so it's been really nice to have some time to do so.

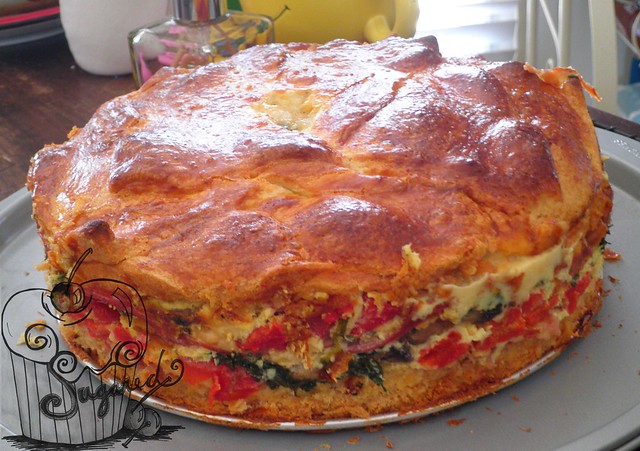
Italian brunch torte I made a couple of weeks ago for Easter.  It was fabulous...but the springform pans I baked the tortes in took hours - HOURS, people - to clean up.  You may remember this and my affirmation to not make anything that causes that much clean-up a second time without phenomenal results.
P3310141_cew


This may well have earned a re-make.  Mind you, it's not something I will make for just an everyday meal, but for a special occasion, I'd roll out the recipe again.  If you want to give it a try yourself, you can find the recipe here.

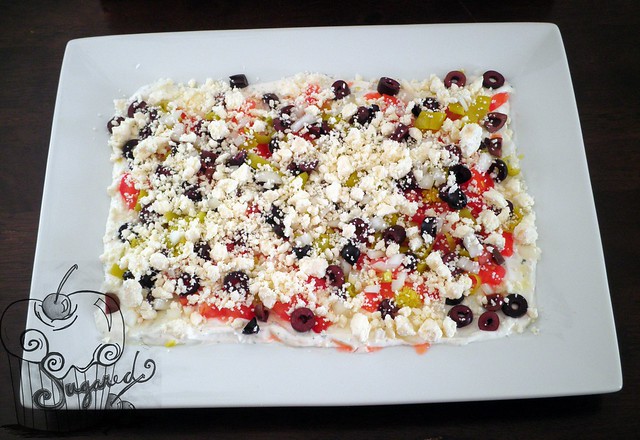
I also made this amazing Layered Greek Ranch dip for Easter.  It went quickly - everyone really seemed to love it.  Stay tuned later in the week for the recipe!
P3300136_cew

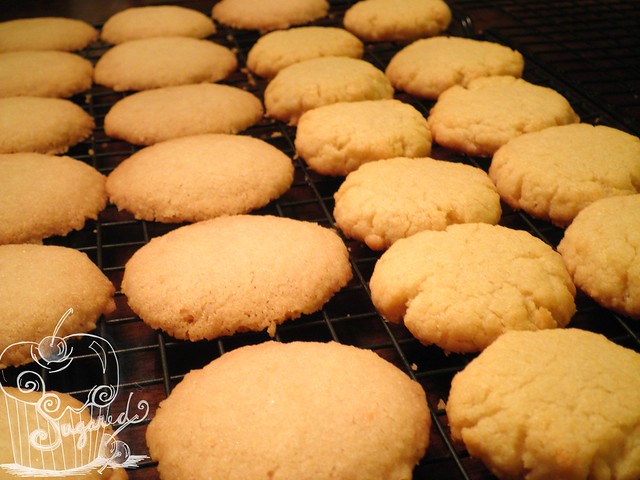
You may remember me mentioning that I was on a quest to make cookies that were dairy, nut, and soy free. I came up with a couple of test recipes, but haven't heard back yet if they were suitable for the client or if they were suitable, if they even enjoyed them.  The coconut-oil shortbread cookies (left side of photo) were downright tasty, in my opinion, and the olive oil cookies (right side of photo) had a very distinctive, almost savory, taste profile.
P3270028_ew

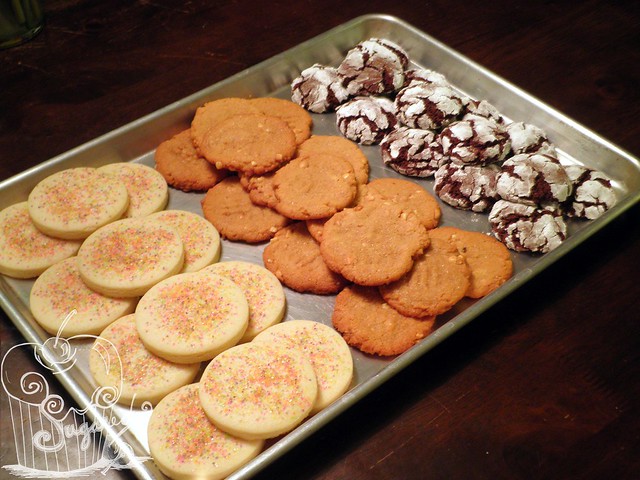
Of course, I also made some traditional drop cookies while I was in cookie making mode.  There's plain sugar with sprinkles, peanut butter, and chocolate crinkle.
P3270034_ew

The peanut butter cookies didn't turn out nearly as well as they usually do.  I think it had something to do with the brand of PB I used - it wasn't my usual choice and next time I won't make the same mistake.

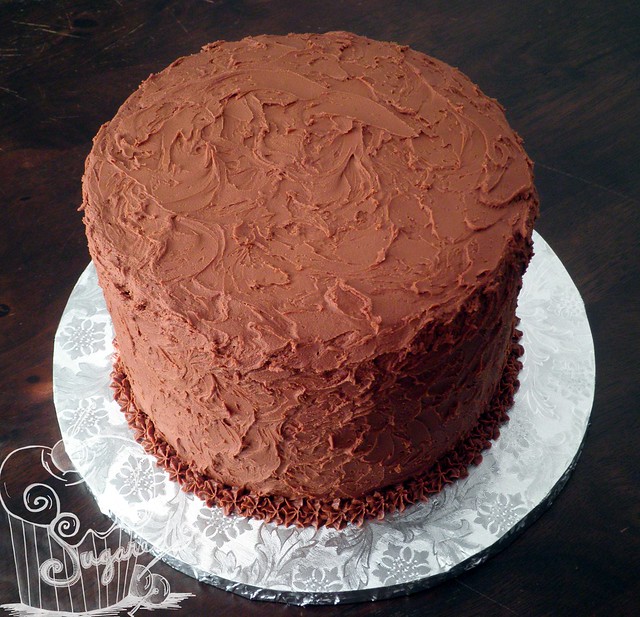
Another chocolate lovers' cake.  Simple, chocolate goodness.  Mmm...mmm...mmm.
P3280042_cew

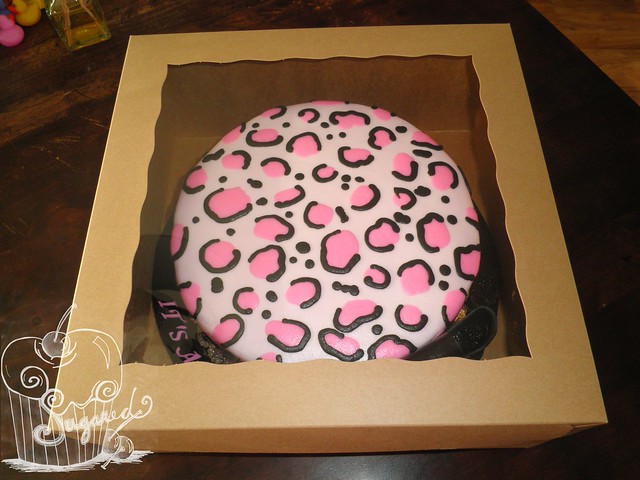
Oh, and look!  I recently started to trying out some different styles of boxes for my cakes and cookies.
P3290088_ew

What do you think of the windowed version?  Add my label to the center of the window?  Pretty nifty, huh?  And being brown kraft, they aren't quite as common as the white bakery boxes you see so often.

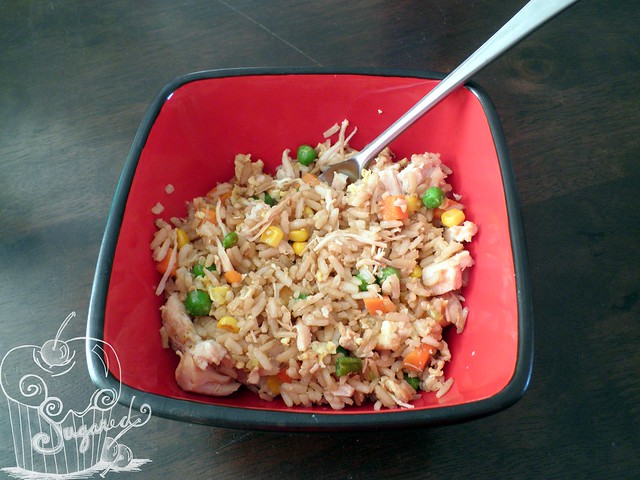
And, one last dish to share with you.  This amazingly easy and delicious chicken fried rice from Iowa Girl Eats.  (Click the link for the recipe.)
P4060025_ew

My photo isn't nearly as pretty as hers, but the dish is delectable.  It's definitely going into my collection of "quick week-night options."  I used brown rice and canned chicken.  I know, I know, but I was being lazy and was curious how it would turn out.  Happy to report it worked just fine, though cooked chicken breast would just make it that much yummier!  And, bonus, it's healthier than take-out.

Talk to you soon!


14 December 2012

Spiced Pecans

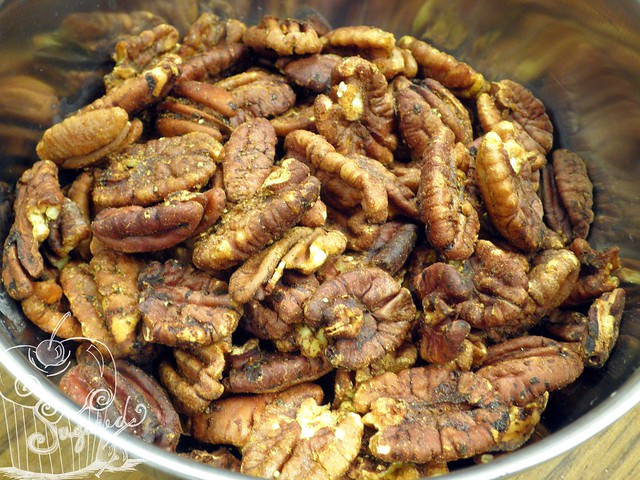
Need a healthy snack during the holidays?  Or really anytime for that matter?  If so, might I suggest these spiced pecans?

They are a little bit spicy and a little bit sweet and are perfect for snacking or to serve as an appetizer.  Oh, and they are a quick fix, too, just 20 minutes plus cooling.  I prefer the pecans warm, right out of the oven, but if you'll be storing them, make sure you let them cool completely.

Don't be concerned if some of your pecans look burnt (unless you forget and leave them in the oven too long...then, yes, be concerned), that's just the spicy goodness caramelizing.  Trust me, the ones that look the most burnt are usually the best and most flavorful.

Couple of additional tips:  1.  Make sure you line your pan with parchment paper, you'll be glad you did.  2. Look for whole coriander in the "ethnic" aisle of your grocery store; you'll pay a fraction of the cost and you'll get considerably more flavor by crushing the seeds immediately prior to use.  I usually find whole spices in the aisle with the Mexican/Spanish foods.  Price comparison?  At my local grocery, the whole coriander in the "ethnic" aisle was $1; the pre-ground stuff in the spice aisle was nearly $5...that's a big difference!

Spiced Pecans
Printable Recipe
Adapted Slightly From Runner's World Magazine
Prep:  5 minutes,  Cook Time:  15 minutes
Yield:  4 to 5 cups

PC131080_ew

Ingredients:

  • 4 to 5 cups pecan halves
  • 3 Tbsp soy sauce
  • 1/2 tsp cayenne pepper
  • 1/2 tsp crushed coriander seed
  • 1/2 tsp turmeric
  • 1 tsp black pepper
  • 1 to 2 Tbsp brown sugar
  • 1 Tbsp olive oil
Preparation:
  1. Preheat oven to 350°F and line a baking sheet with parchment paper.  Place the pecan halves in a medium bowl.
  2. Whisk together the soy sauce, cayenne, coriander, turmeric, black pepper, brown sugar, and olive oil in a small bowl until well combined.
  3. Pour the marinade over the pecans and toss until the pecans are well coated.
  4. Spread the pecans on the prepared baking sheet and roast at 350°F for approximately 15 minutes.
  5. Allow to cool, then store in an airtight container or serve immediately.
Happy baking!

16 August 2012

Crunchy Black Bean Tacos


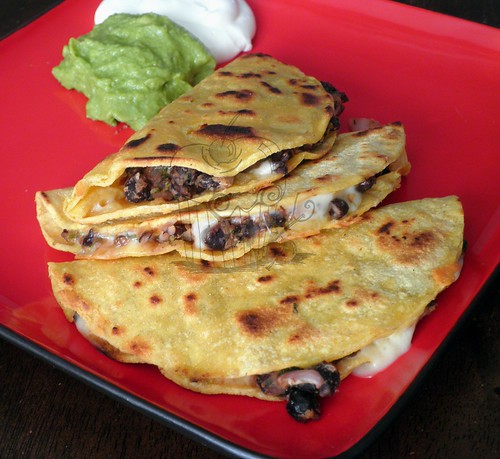
It's been a while since I shared a recipe with you!  So, today, I give you this deliciousness I came across on Pinterest.

Yes...I've been sucked into the Pinterest craze.  Don't judge; I've actually found some great inspiration for cake and life in general, and, obviously, some yummy recipes to try.

What do I love about this recipe?  Let me count the ways:
  1. It's simple to put together (read - no crazy ingredients)
  2. It's ready in about 30 minutes with minimal fuss
  3. It's got a Mexican flare, which is one of my favorite food profiles
  4. And, did I mention, it's scrumptious!
This recipe is from Nick Evans' recent cookbook Cornerstone Cooking; and if the rest of the recipes are anything like this one, I'm going to have to pick a copy up, or at least put it on my Christmas wish list.  It might be a fairly useful cookbook to have on the shelf!

Crunchy Black Bean Tacos
Adapted From:  Cornerstone Cooking
Yield: approximately 8 tacos (serves 4)
Prep:  10 minutes
Ready In:  30 minutes

P8010029_cew

Ingredients:
  • 2 cups black beans, canned or cooked
    • If using canned, rinse before using
  • 1/2 cup red onion, minced 
  • 1 tsp. cumin
  • 1 tsp. paprika
  • 2 Tbsp. cilantro, chopped
  • Pinch of salt and pepper
  • 6 to 8 ounces pepper jack cheese, grated
  • Corn tortillas
  • Olive Oil
  • Salsa, for serving
  • Sour cream, for serving
  • Sliced avocado or guacamole dip, for serving
Preparation:
  1. In a medium bowl, add the beans, red onion, cilantro, and spices, then lightly mash ingredients together.
  2. In a large, non-stick skillet (or on a large griddle), add a few tablespoons of olive oil and heat over medium-high heat.
  3. Add one to two corn tortillas (or as many as will comfortably fit in the skillet/griddle without overlapping) and let them heat in the oil for a few seconds.  Then add about 1/4 cup of the bean filling to one half of each of the tortillas.  Top with a sprinkle of grated cheese.
  4. Using a spatula, carefully fold each tortilla over so it forms a shell.  Press down lightly on the folded tortilla(s) so it holds it shape.
  5. As the first tacos cook, move them to the sides of the pan and start additional tacos, if space allows.  
  6. Cook each taco for about 3 minutes per side or until they are nicely browned and crispy.
  7. Serve tacos with salsa, sour cream, and guacamole or avocado.  Or any other toppings you prefer!
Notes:
  • Corn tortillas are very resilient to heat and very flexible once warmed up; don't worry about burning them.  Just be sure to cook them on each side long enough to get them really crispy.
  • Depending on the size of your skillet or griddle, you can likely cook 3 or more tacos at once.
  • When flipping the tacos, use a spatula and flip the taco towards the fold so the filling doesn't fall out. 
Happy cooking!

13 June 2012

Greek Chicken Wraps

I've got a recipe for you today!

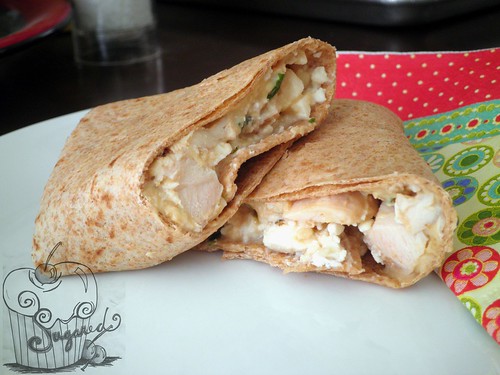
Best part?  It's a "quickie," not even 30 minutes and you've got it made!  And, these make excellent leftovers, served warm or cold.  Hmm, healthy brown bag lunch option, perhaps?

The photo doesn't look like much, but I promise, these are delicious.  Oh, and, we are going to pretend that there are tomatoes in the wrap in the photo...mmmk?  We used up all the 'maters before I got around to taking the pictures.  Sorry!

Greek Chicken Wraps
Printable Recipe
Adapted Slightly from "Emily Bites"
Prep/Cook Time:  15 minutes
Yield:  Approx 6 wraps
Greek Chicken Wraps

Ingredients:

  • 1 Tbsp extra virgin olive oil
  • 1 clove garlic, minced
  • 1/2 tsp dried basil
  • 1/2 tsp dried oregano
  • 1/4 tsp  dried rosemary
  • 12 to 16 oz pre-cooked chicken strips (I used the Tyson Grilled & Ready frozen variety)
  • 6 wheat tortillas or wraps
  • 3/4 cup roasted garlic hummus (or any other flavor you prefer)
  • 3/4 cup crumbled feta cheese
  • 2 plum tomatoes, diced
  • Balsamic vinegar

Preparation:
  1. In a medium skillet, heat the oil over medium high heat.  Add the garlic, basil, oregano, and rosemary; cook 1 minute or until garlic is fragrant.  Add the chicken and stir to coat with the oil/herb mixture.  Cook for 5 to 6 minutes or until chicken is warmed through.
  2. Warm the tortillas/wraps.  Spread 2 tablespoons of hummus down the center of each tortilla.  Divide the chicken evenly among the 6 tortillas, then top each with 2 tablespoons crumbled feta and a few tomato pieces.  Drizzle with balsamic vinegar.  Fold in the ends of each tortilla, then roll the sides to make a wrap.  Slice each wrap in half before serving, if desired.
Happy cooking!


31 May 2012

"May"hem

Have you been having cake design withdrawals?  If so, fear not; I'm here to feed your addiction...and in a big way.  We're talking all, yes, ALL, of the cakes from the month of May.  There are even a few cupcakes and one prom dinner included at no extra charge!

Why am I sharing everything with you in one GIANT post?  Because I love ya!  Well, that, and because I've been so swamped these past few weeks that something had to get put on the back burner if I wanted to get any sleep at all; and yep, the editing/uploading of photos and writing of posts won that race.  Or maybe it lost the race?  Either way...let's get started, shall we?

#1.  My favorite cartoon character hands down.  And, of course, a cake with his image wouldn't be complete without a few burgers and the team's van!  The burgers were actually "Krabby Patties" gummy candies, but they worked like a charm.
P5040847_cew

#2.  The first of many of the graduation themed cakes from these past few weeks.  The graduation cap cutouts and "Class of 2012" were made from an icing sheet cut on the Silhouette, the paw print was fondant.

P5040861_cew

#3.  The fraternal, not identical, twin of Cake #2.  Again the stars and inscription were Silhouette cuts using an icing sheet, the graduation cap was made from rice krispies and fondant.

P5040866_cew

#4.  Graduation cake for a political science major at THE state's college!  I hand-cut and layered the logo and gavel using gumpaste.  The lettering was cut using the Silhouette.  (Seeing a theme here with my Silhouette usage?  If not, give me a minute...it'll get clearer.)

P5040888_cew

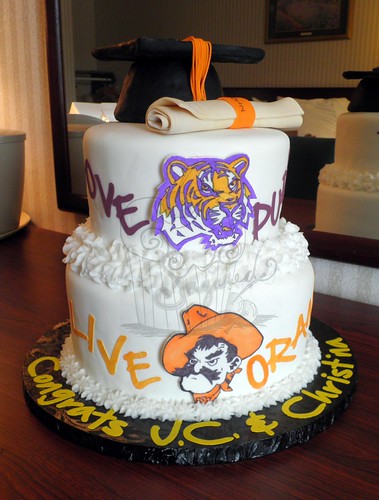
#5.  Another OSU grad cake, the recipients of this one were headed to LSU for the next step in their adventure.  The cake is rather hard to read, but said "Love Purple" across the top tier, and "Live Orange" across the bottom tier.  The decorations were made from fondant/gumpaste; the phrases from icing sheets. And, yes, that is a motel room serving as the backdrop.  This cake, along with #4 and #8, were traveling cakes!
  
P5040896_cew

#6.  Hello!  A pretty pink birthday cake with a friendly kitty and lots of flowers.  The letters on this cake were fondant and were not cut using the Silhouette. *wink, wink*

P5050912_cew

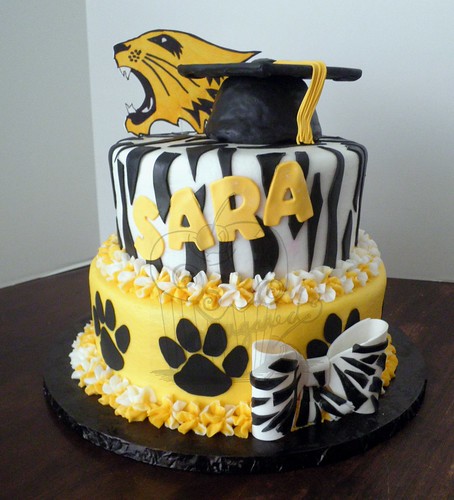
#7.  An animal themed graduation cake.  Paw prints, zebra stripes, and a wildcat, oh my!  The school mascot = wildcat, hence the paw prints and topper, but the honoree adored zebra stripes, so we also had to make sure those were included.

P5060935_cew

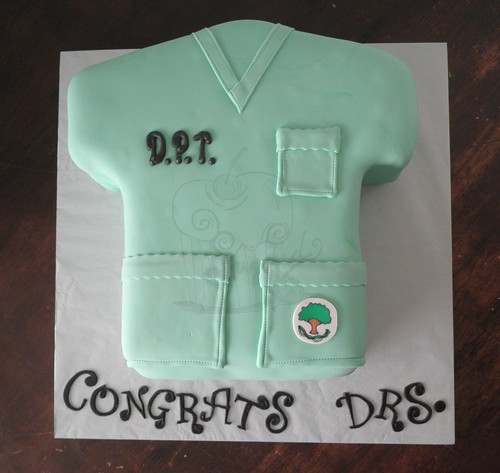
#8.  Scrub top cake for a friend's graduation from physical therapy school.  The cake was chocolate with a toasted marshmallow buttercream and crushed graham cracker filling.  Yum, yum!

P5070951_cew

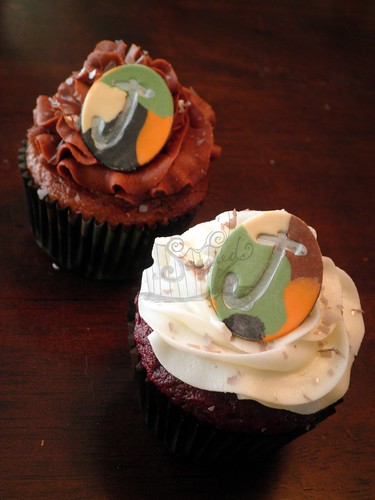
#9.  Cupcakes!  With camouflage toppers!  Bet you had a hard time seeing them, huh?

P5101010_ew

Good news!  We are halfway to the finish!  Woo!  Do you need to top off your cup of coffee?  I'll wait...

Oh good, you came back!  Let's resume our tour.

#10.  Cupcakes!  For a 2012 graduate whose school colors just happened to be red, white, and blue.  This design would make a fun treat for July 4th...hmm...

P5101008_cew

#11.  Cake for the same school's graduation as the cupcakes above, but for a different honoree.  The eagle was made from gumpaste.

P5111022_cew

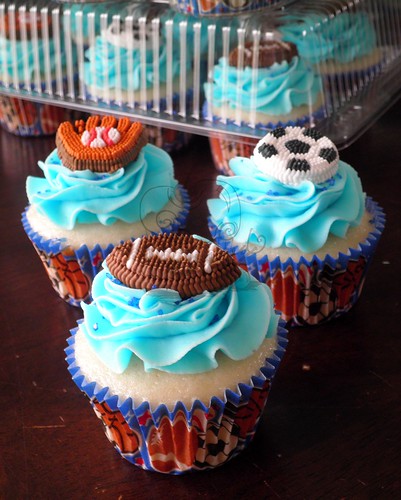
#12.  Sports themed cupcakes for a baby shower.  The toppers were Wilton royal icing decorations.  Don't judge...I was under time constraints due to being unable to get in contact with the client.  They still turned out very cute, even with the mass produced decorations!

P5111029_cew

#13.  Gold, black, and silver star topped cuppies for a new college grad.

P5121037_cew

#14.  A multicolored, floral themed cake for a younger graduate.  Chocolate cake with chocolate chip cookie dough filling.

P5141046_cew

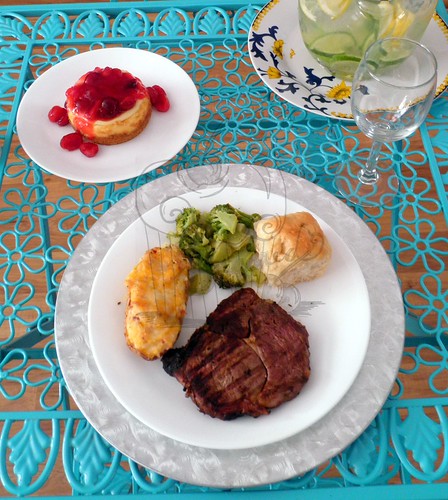
#15.  The prom dinner Madre and I put together for my niece and her date - steaks, twice baked potatoes, broccoli, dinner rolls, and cherry cheesecake, all homemade, of course!  The original plan was to serve dinner on the deck, but the 35 mph winds and near 100°F heat thwarted us, so yes, my patio set was relocated to my living room.  It all worked out though!

P5181054_cew

Hungry now?  Hang with me just a few more minutes...only four left!

#16.  A "naughty/nice" cake for a "bachelorette shower."  I had originally designed a different cake, but the bachelorette party became a bridal shower, so I had to make some changes.  Oh, and I learned an important lesson...never use the method I did to apply petal dust to a buttercream, it didn't turn out so well, certainly nothing like I envisioned. *sigh*

P5191060_cew

#17.  Jewels, feathers, and a crown...definitely a cake fit for a princess.  There was a different castle backdrop framed in purple on each side of the cake; the client planned to add princess figurines after delivery.

P5191090_cew

#18.  A simple graduation cake for a reception honoring students from several schools.  The grad cap and scroll were gumpaste; the lettering Silhouette icing sheet cutouts.

P5201110_ew

And, at long last...drum roll, please...the final cake!

#19.  And, yes, it's another graduation cake!  This one for the hometown event, complete with orange polka dots and paw prints.

P5221118_cew

Are you still with me?  If so, I applaud your stamina!  Thanks for sticking it out, you have my permission to go take a nap now if you'd like.

Talk to you soon!

25 May 2012

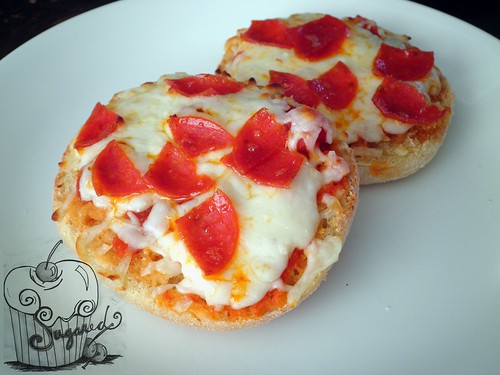
English Muffin Mini Pizzas

This recipe is a blast from my childhood...I hadn't made one of these in years!  But then, the other day, as I was staring into my nearly empty refrigerator - yes, I needed to go FOOD shopping, I can make a baked good or pastry item at the drop of the hat, but a savory meal...fugetabouit!  And before you go thinking I can't cook, I can!  It's just that I don't normally have savory ingredients on hand...

Anywho...as I was staring into my nearly empty refrigerator, my eyes landed on the package of English muffins...and the pepperonis, left over from some past dish...and, viola!  I decided to make English Muffin Pizzas!

These are great, and probably the reason my mom had them in the food rotation when my sisters and I were younger, because #1:  they are ready in about 15 minutes and #2:  everybody can make their own pizza, choosing only the toppings they like.  Assuming you provide a plethora of toppings, of course.

English Muffin Mini Pizzas
Printable Recipe


P5010827_ew

Ingredients:

  • English Muffins, plain, split into 2 halves
    • Plan 1 to 2 muffins per person, or 2 to 4 "slices"
  • Pizza Sauce, jarred or homemade
  • Cheese of your choosing (I like to use Mozzarella or a Mexican Fiesta Blend)
  • Additional Toppings of your choosing, some suggestions:
    • Pepperonis (you'll want to quarter them or use the minis)
    • Cooked, scrambled sausage or hamburger
    • Bell peppers
    • Onions
Preparation:
  1. Preheat the oven to 375°F.  Line a baking sheet with foil, and place the desired number of English Muffin halves onto it.
  2. Add the pizza sauce, cheese, and any additional toppings to the muffin halves.
  3. Bake for 15 minutes or until the cheese is melted and the muffins are heated through.
  4. Serve as is, or if you have a broiler and would like to get a nice crunch on the edges of the muffins, place them under the flame for a few minutes before serving.  Just watch them carefully so they don't burn!
Happy cooking!


02 December 2011

Superstitious Stew

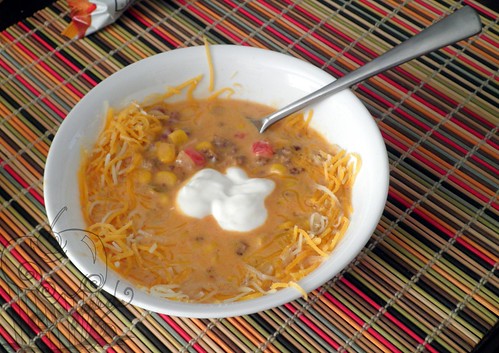
The OSU v OU game is this Saturday!  Bedlam is pretty much a state holiday here in Oklahoma, and while I'm just making a delish dip and olive relish for the tailgate, for those of you who will be warm at home, give this quick stew a try.  (I'm not sure why it's called Superstitious Stew, other than the fact that it is a perfect football viewing food!)  You can also turn it into a fabulous warm dip by adding additional Velveeta cheese, if you'd like.

Superstitious Stew
Printable Recipe
Adapted from Tasty Kitchen
Prep/Cook Time: 30 minutes
Yield:  4 servings

P9201355_cew

Ingredients:

  • 1 lb lean ground beef
  • 1/2 whole onion, chopped
  • 15 oz can beef broth
  • 15 oz can whole kernel corn, drained
  • 10 oz can diced tomatoes and green chilies, undrained
  • 1 pound Velveeta, cubed
  • 15 oz can Ranch Style Beans, undrained
  • Corn chips, optional
  • Sour cream, optional
  • Shredded cheese, optional

Preparation:
  1. Brown the ground beef and onion in a large skillet.  Drain.
  2. Using the same skillet, add the ground beef/onion mixture, beef broth, corn, diced tomatoes and green chilies, and Velveeta.  Cook on medium heat, stirring occasionally until the cheese is melted.
  3. Add beans, then heat until bubbly, stirring occasionally.
  4. Serve over corn chips and topped with sour cream and additional cheese, if desired.

Go Pokes, Go Pokes, Go Pokes...Go!  
Guess who I'm rooting for?  Happy cooking!

29 September 2011

Stuffed Pork Tenderloin

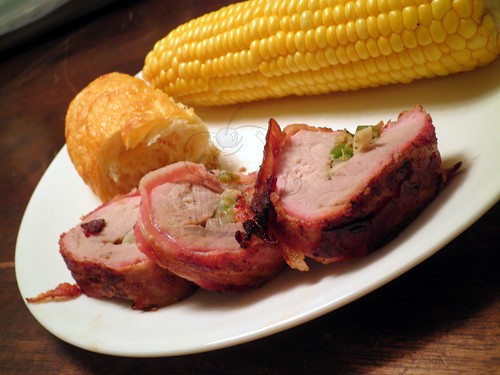
I haven't shared a recipe with you in a while, and since I don't have any cake photos to post right now, I figured today was the perfect day!  This recipe is courtesy of K, whose one of those cooks that doesn't believe in measuring ingredients or following a recipe - the complete opposite of yours truly!  Luckily, this approach, more often than not, results in some very tasty dishes, like this one, for instance...

Stuffed Pork Tenderloin
Printable Recipe
Courtesy of K
Yield will vary depending on tenderloin size
Average Yield: approx 4 servings
P9261370_ew

Ingredients:
  • 1 pork tenderloin
  • 1 lb bacon
  • 1 jalapeno, seeds removed, julienned
  • 1/2 white onion, sliced
  • 4 cloves garlic, peeled and chopped
  • 1 roasted green chile, chopped (Roasting instructions, here)
Preparation:
  1. Cover part of a grill grate with aluminum foil, preheat grill to medium-low.  
  2. Butterfly tenderloin lengthwise.  Place jalapeno, onion, garlic, and green chile on one side of the loin.  Add salt and pepper to taste.  Close the tenderloin, and wrap with the bacon.  (You may not need the entire pound of bacon, if not, save it for breakfast the next day!)  Secure the bacon with several toothpicks.
  3. Place loin on the aluminum foil on the grill.  Grill until the internal temperature of the pork reaches 145°F.  Remove from grill and allow to rest for 3 to 5 minutes.  Slice into medallions, removing toothpicks as you plate each piece.
Delish!

24 August 2011

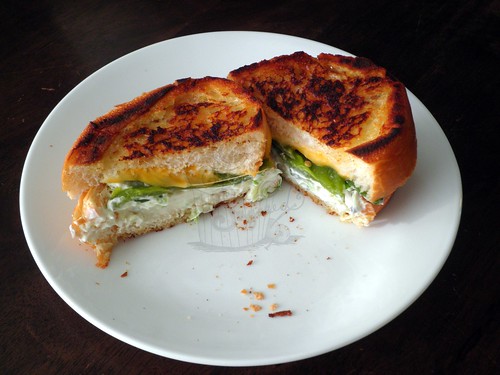
Jalapeno Popper Sandwiches

This is a fun take on the traditional jalapeno popper, and it's a super easy recipe to prepare - it only takes about 30 minutes. While the recipe doesn't call for any protein (and it is fabulous without it), don't be afraid to try adding some!  Bacon is a perfect accompaniment, though shrimp would be yum as well.  Oh, and don't skimp on the bread...K and I only had a French loaf on hand when making these, and while they were delicious, the bread wasn't quite sturdy enough to hold up to all the gooey goodness.

Jalapeno Popper Sandwiches
Printable Recipe
Adapted from SimplyScratch
Yield:  2 Sandwiches

P8170937_ew

Ingredients:

  • 4 whole jalapenos, roasted & steamed (Instructions can be found here.)
  • 4 ounces cream cheese, softened
  • 2 whole green onions, minced
  • Black pepper to taste
  • 4 slices sourdough bread
  • 4 slices Colby Jack or cheddar cheese
  • Butter

Preparation:
  1. Preheat a griddle to 375°F.
  2. Combine the cream cheese, minced green onion, and black pepper in a small bowl.  Spread the desired amount of cream cheese mixture onto two bread slices, then layer the roasted peppers and cheese over the onion/cream cheese spread.  Top with the remaining two bread slices.
  3. Butter the outer sides of each of the bread slices and cook on the heated griddle until golden and crispy.  Serve warm.
Delish!

19 May 2011

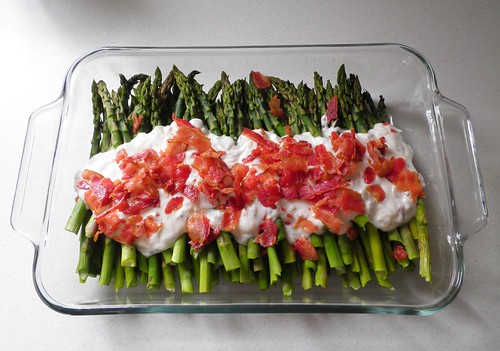
Bacon & Caramelized Onion Asparagus

Had a few extra minutes today, so I thought I'd share the 15 minute asparagus recipe that I made back in April for our Easter feast.  Asparagus is in peak season right now...makes it the perfect time to give this recipe a try!

Bacon & Caramelized Onion Asparagus
Printable Recipe
Adapted from Kraft Foods
Yield:  6 servings
P4240182_cw

Ingredients:

  • 4 slices ready-to-eat bacon OR 4 Tbsp. bacon bits
  • 1.5 lbs fresh asparagus spears, trimmed
  • 1 Tbsp. water
  • 1/2 cup chopped onion
  • 3/4 cup ranch dressing

Preparation:
  1. Warm bacon in a large skillet, until slightly crisp.  Remove bacon from the skillet; place on paper towels to drain.  Discard any drippings, but do not wash the skillet.
  2. Place the trimmed asparagus in a microwavable casserole dish.  Add the water.  Microwave on High 4 to 5 minutes or until asparagus is crisp-tender.
  3. While the asparagus is microwaving, add the onions to the skillet; cook and stir approximately 5 minutes or until tender.  Stir in the ranch dressing.
  4. Drain asparagus; top with the ranch dressing sauce and bacon.  Serve warm.


Tip for Trimming Fresh Asparagus:
Instead of trimming with a knife, simply bend the spear near the bottom end.  The asparagus will naturally snap off at the right point, effectively removing the tough, "woody" portion of the stalk.

Happy cooking!

27 April 2011

Easter Extravaganza

I hope you all had a blessed Easter, and that you were able to spend it in the company of those precious to you.

In lieu of cakes this week, I thought I'd share some of the dishes my family partook of during our Easter celebrations, as well as some of our egg-y creations.  So without further ado...

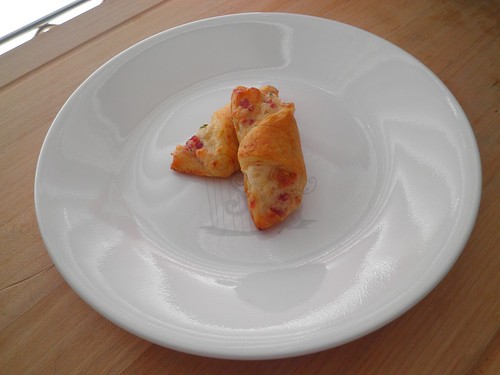
First things first, we had to dye eggs...all 306 of them.  And of course, all that creativity made us hungry!  Luckily, we had some delicious finger foods on hand, like these bacon appetizer crescents.

P4220114_w

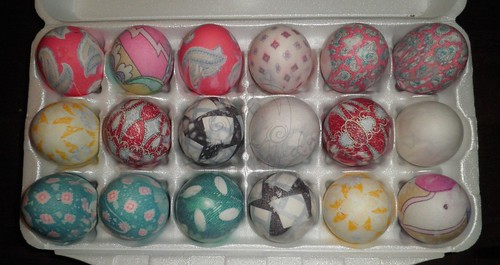
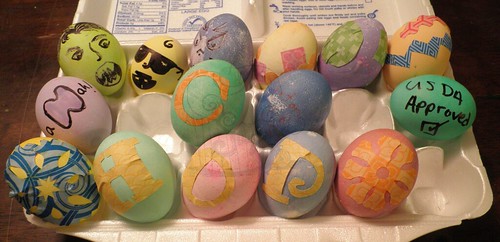
I'd say the nourishment worked.  We had some beautiful and very colorful eggs...including some dyed using silk, several that had hand drawn embellishments, and even a few "origami" ones.

P4230146_cw
Silk-dyed Eggs

P4230142_cw
"Origami" and Hand-Embellished Eggs

We had our egg-dyeing adventures on Friday, which allowed me to spend most of Saturday preparing Easter dinner for our group.  One thing I love about cooking for the family is that I get a chance to try out lots of new recipes; seldom do I offer the same dish twice.  After all there are too many ways to experience food out there, no reason to stick with the same dishes all the time!  My family is a wonderful test group (for the most part) and seldom complains, although they do ask that I stay away from overly exotic ingredients - they have their limits on adventurous eating it would seem...

So, in order to keep from going too far afield from the family's preferred taste profile, I made a mustard rubbed, panko-crusted pork loin as the main dish for our meal, accompanied by an assortment of sides, including Italian Smashed Potatoes, corn, and Classic Baked Macaroni & Cheese.  All of the dishes were pretty good, but I think they were slightly overshadowed by two of the other choices I offered - 

The bacon and caramelized-onion asparagus (get the recipe here)

P4240182_cw

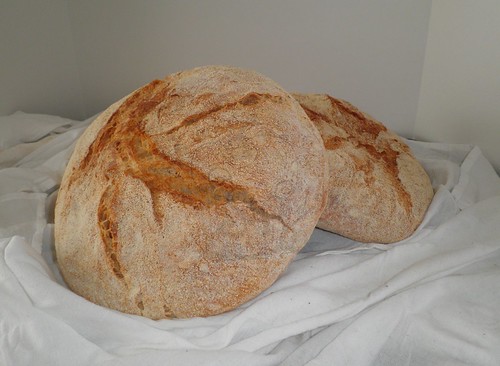
And the no-knead bread.

P4240152_cw

Both of these received rave reviews from the crowd though they couldn't be more different in terms of time requirements.  The asparagus was a microwave recipe that took all of 15 minutes to prepare; the bread 18+ hours!  (Guess it just goes to show that input time is not always a deciding factor in deliciousness.)

I didn't slack off when it came to desserts either.  After all, they are the most important part of the meal, right? 

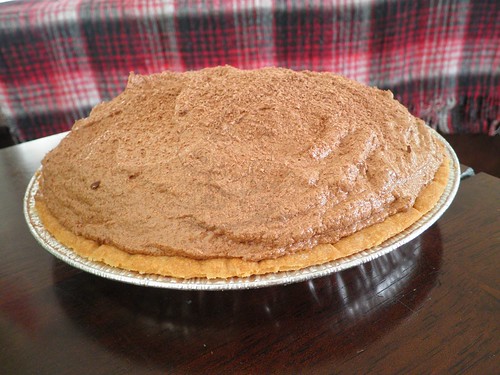
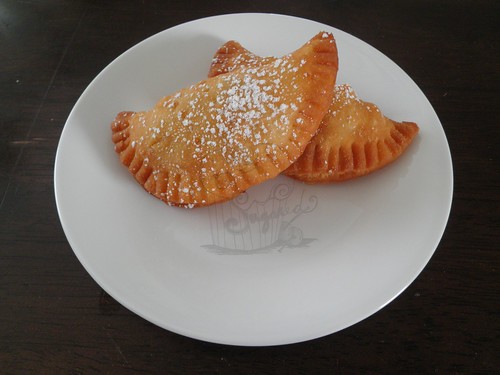
I made sure to offer up something for everyone, including Easter-themed sugar cookies, Almond Bark Drop Cookies, Lemon Cheesecake, French Silk Chocolate Pie, and Shoebox Apple Tarts.

P4230129_w
French Silk Chocolate Pie

P4240174_w
Shoebox Apple Tarts

Admittedly, there may have been a few sugar highs in our group after dessert, but at least they weren't induced by the beheading of innocent chocolate bunnies.  In fact, I can honestly say that no chocolate bunnies were harmed in the creation of this meal.  As for Peeps...well, that's another story...

Ta-ta for now!